
How to Choose Your First Coffee Grinder
Editorial standards: this guide uses current manufacturer specifications, published documentation, brewing workflow, serviceability, and product limitations. CoffeeGearHub does not claim hands-on testing where it has not occurred.
At a glance
What this guide covers
This guide explains how to choose a first coffee grinder by starting with burr quality, brew method, daily cup volume, manual-versus-electric workflow, adjustment range, maintenance, and realistic upgrade paths.
Editorial analysis
Buy the workflow before the specification sheet
A grinder that is easy to set, repeat, clean, and live with will teach a beginner more than a feature-heavy model whose controls do not match the brewing routine. Start with cup count and brew method, then decide how much manual work you are willing to do.
The 30-Second Answer
Choose a burr grinder, not a blade grinder. Use electric if convenience and multiple cups matter most; use manual if compact size, quiet operation, and fine adjustment matter more. Make sure the grinder covers your actual brew methods, then learn to change one grind variable at a time.
Why Your First Coffee Grinder Matters More Than Your Brewer
Most beginners buy a coffee maker first and treat the grinder as an afterthought. This is backwards. The grinder has a bigger measurable impact on cup quality than almost any other variable — including the brewer itself, the water temperature, or even the coffee beans.
Here’s why: pre-ground coffee starts losing aromatics within 15–30 minutes of grinding. By the time you buy it from a store shelf, crucial volatile compounds responsible for sweetness, brightness, and complexity have largely off-gassed. Grinding fresh — even with a modest burr grinder — preserves those aromatics right up to brew time. The difference isn’t subtle. It’s immediately noticeable.
Beyond freshness, grind consistency is the second pillar. When particles are uneven — some coarse, some powdery — different-sized pieces extract at completely different rates in the same brew. Coarse fragments under-extract (sour, weak, hollow) while fine powder over-extracts (bitter, harsh, drying). The result is a cup that tastes simultaneously off in two directions, with no clear fix. A consistent grind eliminates this problem at the source.
🔬 The extraction chain: grind size → particle surface area → extraction rate → flavor balance. Everything downstream of the grinder is easier to control when your grind is consistent.
What you gain from grinding fresh with a decent burr grinder:
- More consistent flavor — repeatable results from the same beans
- Less bitterness and sourness — even particle size means even extraction
- Preserved aromatics — sweetness and complexity are intact at brew time
- Easier improvement over time — you can actually taste what grind adjustments do
- Multi-method flexibility — one good burr grinder works for pour-over, drip, AeroPress, French press
New to specialty coffee overall? Before going deeper, our complete Coffee for Beginners guide gives you the full context.
The Extraction Science Behind Grind Size (Plain English)
You don’t need a chemistry degree to make great coffee — but understanding a few fundamentals will help you troubleshoot problems and make smarter adjustments when your coffee tastes off.
When hot water meets coffee grounds, it dissolves soluble compounds in a specific sequence. The same three stages happen in every brew:
- Early extracts: acids and salts — these give brightness and clarity, but taste sharp and sour in isolation
- Mid extracts: sugars and aromatics — this is the “sweet spot.” Caramel, fruit, chocolate, and floral notes live here
- Late extracts: bitters and astringents — these create the drying, harsh finish associated with over-extracted coffee
Grind size controls how fast water moves through all three stages. A finer grind increases surface area and speeds up extraction — useful for short brew windows (espresso, AeroPress concentrate). A coarser grind slows extraction — useful for long brew windows (French press, cold brew). The goal for any brew method is to reach stage 2 without blasting into stage 3.
The beginner shortcut: sour or thin = under-extracted, grind finer or brew longer. Bitter or harsh = over-extracted, grind coarser or brew shorter. Balanced but weak = strength issue, not extraction — add more coffee.
Grind Size by Brew Method: Quick Reference
Different brew methods require different grind sizes because contact time, water flow, and pressure all vary. This table gives you the starting point for each method — no memorization needed, just bookmark it.
| Brew method | Grind range | Texture reference | Contact time | Why this grind |
|---|---|---|---|---|
| Cold brew | Extra coarse | Cracked peppercorns | 12–24 hr | Very long steep; fine grind over-extracts badly |
| French press | Coarse | Breadcrumbs / sea salt | 4–5 min | Immersion brew; coarse reduces sludge and bitterness |
| Drip coffee maker | Medium | Sand / kosher salt | 4–6 min | Gravity flow; medium prevents clogging and channeling |
| Pour-over | Medium to medium-fine | Table salt → fine salt | 2:30–4:00 | Controlled pour; fine-tune to roast level |
| AeroPress | Medium-fine | Table salt | 1:30–2:30 | Short window benefits from slightly finer grind |
| Moka pot | Fine (not espresso) | Fine sand | 4–6 min | Pressure-driven; too fine stalls or tastes harsh |
| Espresso | Extra fine | Fine powder | 25–30 sec | Very high pressure; requires extremely fine, consistent grind |
For a full visual reference with photos of each grind size, see our Coffee Grind Size Chart.
Compare two starting workflows
Electric convenience vs manual control
The Encore and K6 represent two useful beginner directions: a serviceable countertop electric grinder and a compact hand grinder with fine external adjustment.
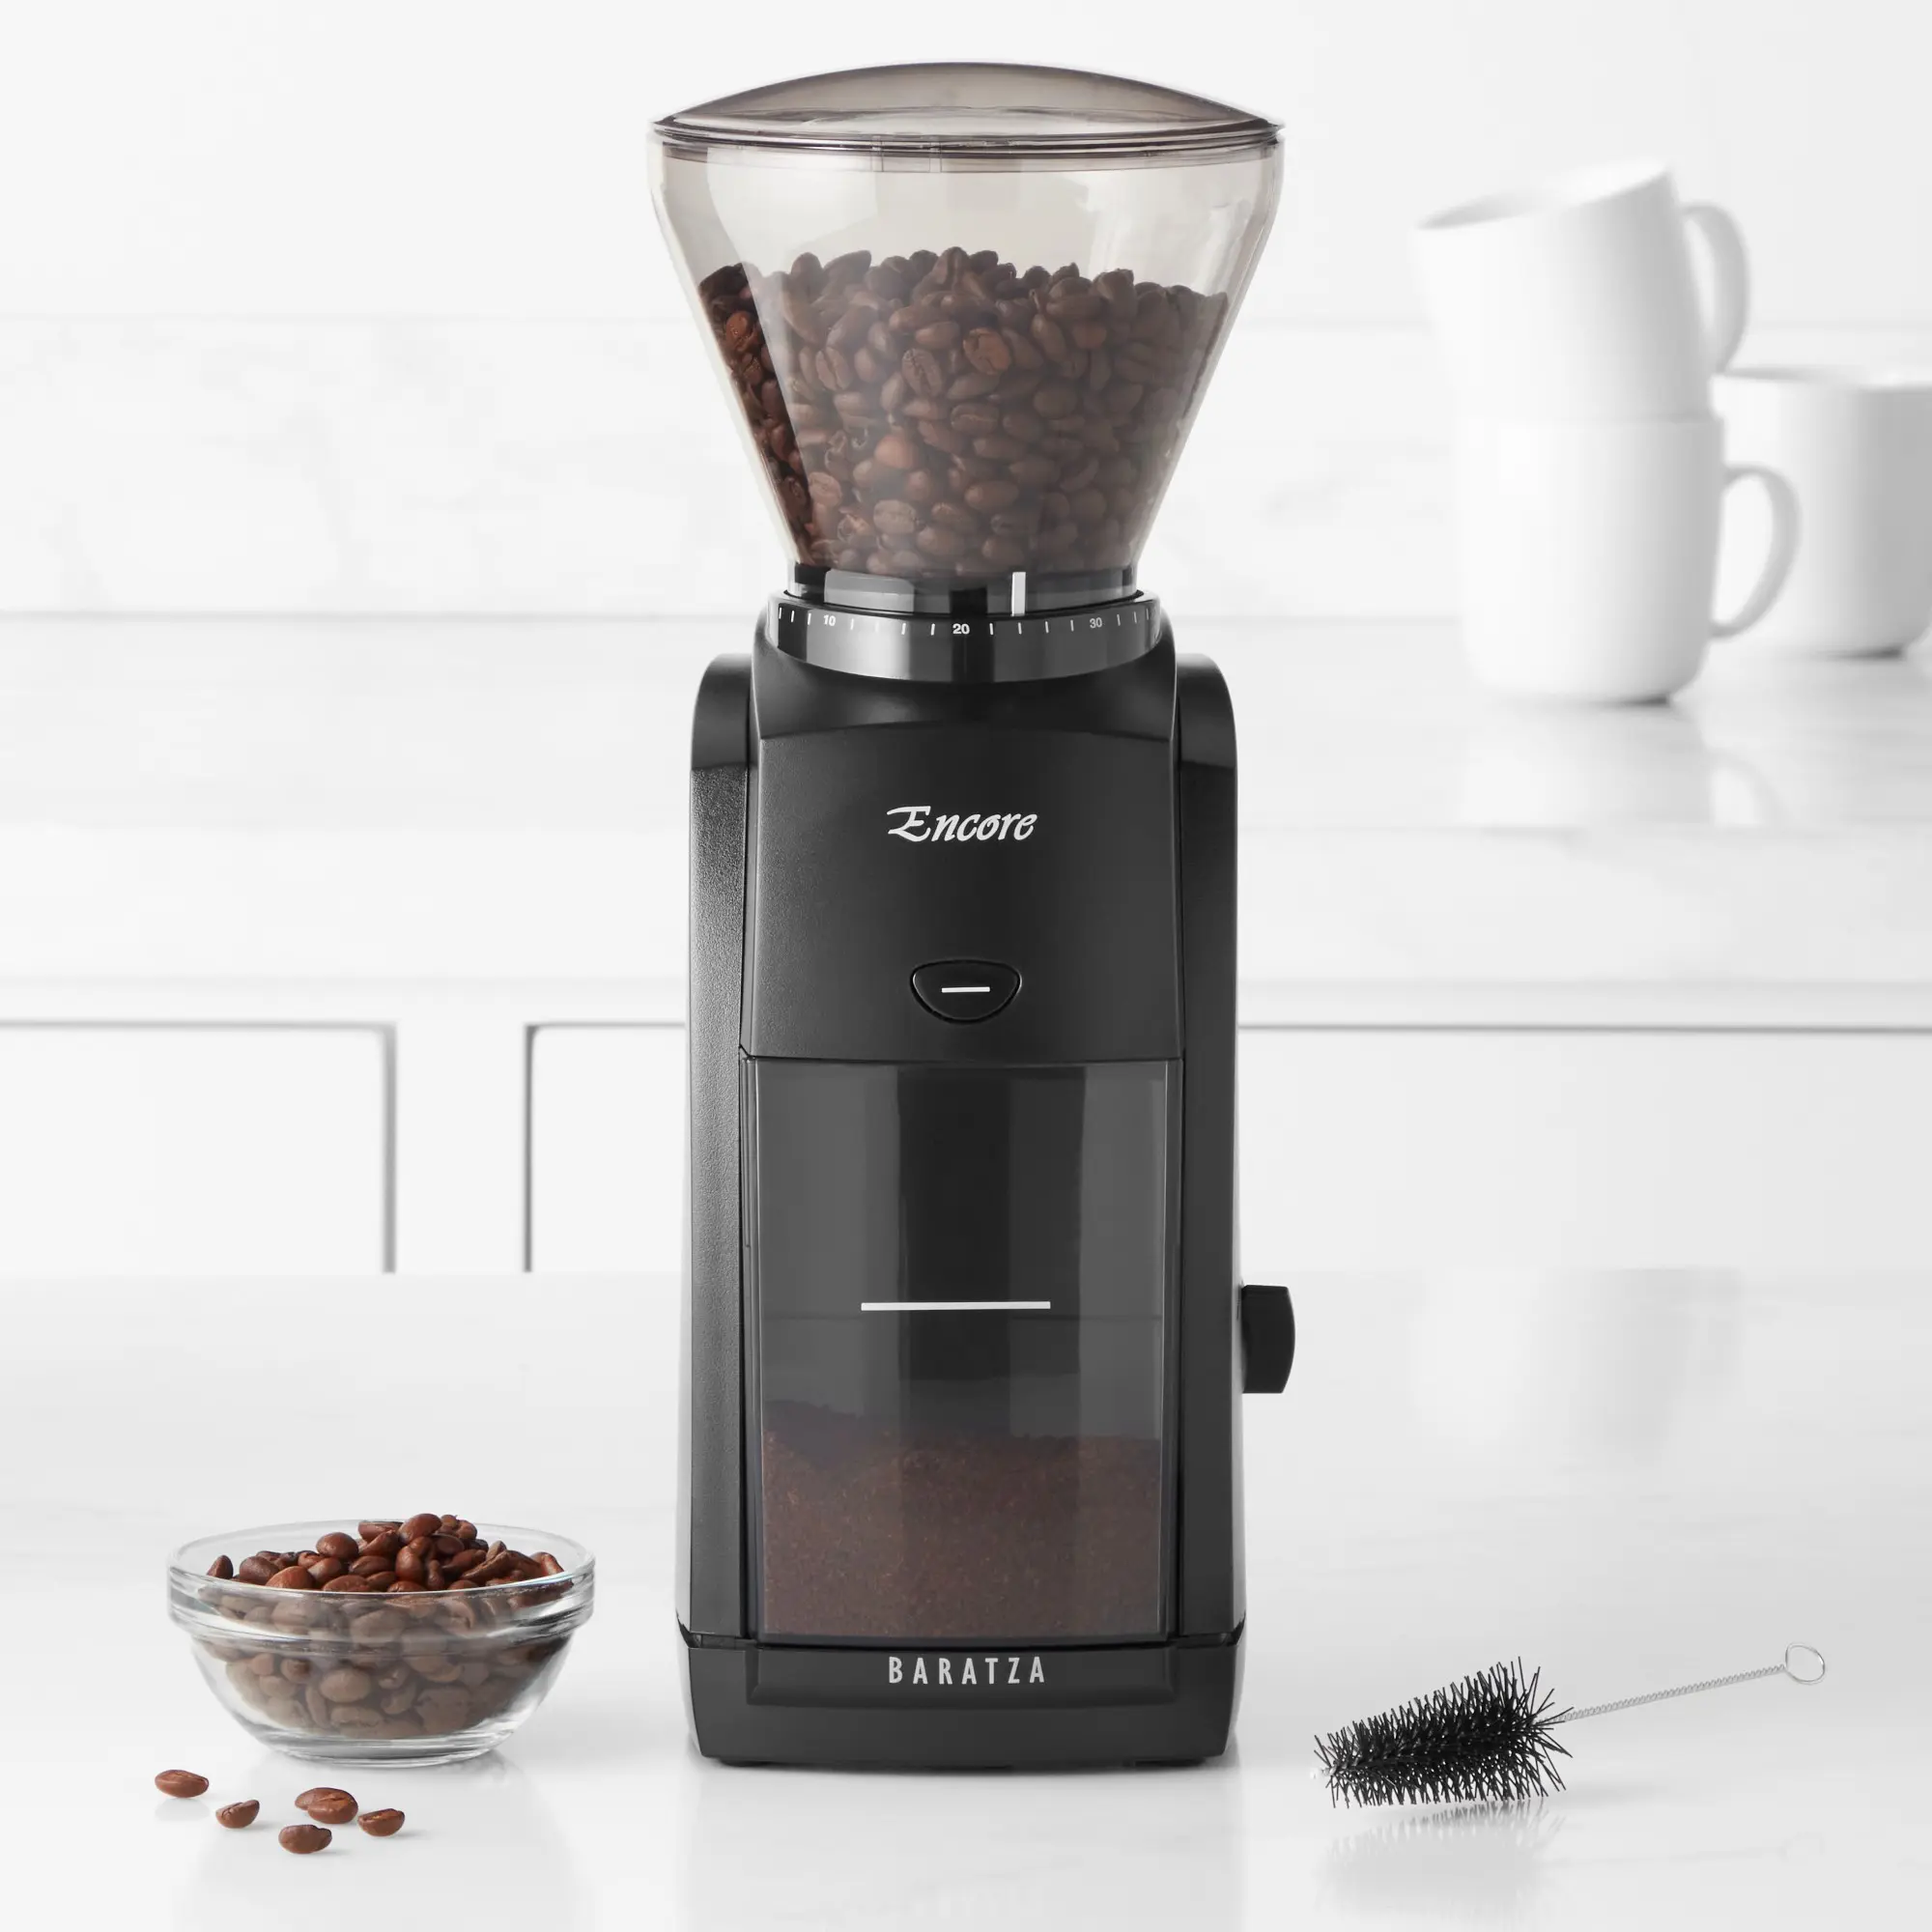 Baratza EncoreSimple electric filter grinder with 40 settings and a serviceable parts ecosystem.Check Price on Amazon →
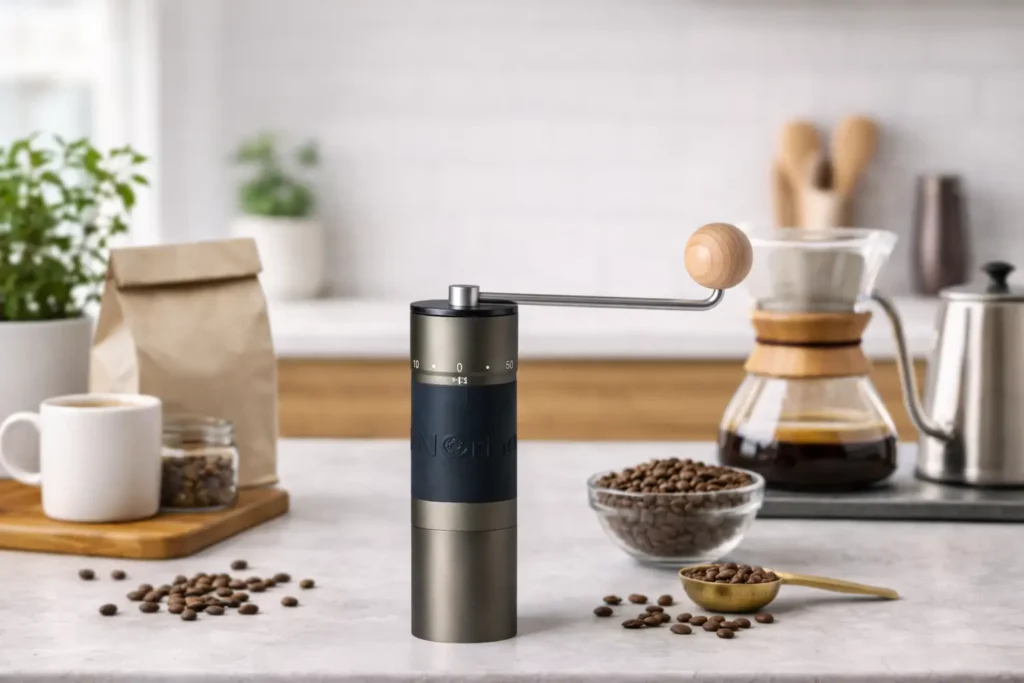 KINGrinder K6Manual grinder with 48mm heptagonal stainless-steel burr and external adjustment.Check Price on Amazon →
Affiliate disclosure: These Amazon links may earn CoffeeGearHub a commission at no additional cost to you. Prices and availability can change.
Burr vs Blade Coffee Grinders: The Most Important Decision
This is the single most consequential choice when buying your first grinder. Everything else — electric vs manual, price, brand — comes after this.
| Feature | Burr Grinder | Blade Grinder |
|---|---|---|
| How it works | Crushes beans between two burrs (surfaces) | Chops beans with a spinning blade |
| Grind consistency | Even, repeatable particles | Uneven — mix of powder and chunks |
| Grind size control | Dial or click adjustment — precise | Time-based guesswork — unpredictable |
| Taste results | Cleaner, more balanced, more repeatable | Often simultaneously sour and bitter |
| Ability to troubleshoot | Clear: adjust grind, taste the difference | None — too many uncontrolled variables |
| Best for beginners? | ✅ Strongly recommended | Only if budget is below $30 and temporary |
How Burr Grinders Work
Burr grinders use two abrasive surfaces — one stationary, one spinning — set a precise distance apart. Beans are fed between them and crushed to a consistent size determined by that gap. Narrow the gap → finer grind. Widen it → coarser grind. The result is a narrow particle size distribution, which means most grounds are close to the same size and extract at the same rate.
There are two burr shapes commonly found in consumer grinders:
- Conical burrs — cone-shaped inner burr fits into a ring-shaped outer burr. Lower RPM, less heat, less static, quieter. Most beginner and mid-range grinders use conical burrs.
- Flat burrs — two parallel disc-shaped burrs. Generally found in higher-end or commercial grinders. More uniform at the top tier, but not meaningfully better for most beginners.
For beginners: conical burr grinders are the right choice. They’re available from $40 (hand grinders) to $200+ (electric), cover every brew method well, and the consistency advantage over blade grinders is immediate and dramatic.
Why Blade Grinders Produce Bad Results
Blade grinders use a high-speed propeller blade — the same mechanism as a kitchen spice grinder — to chop beans. The longer you run it, the finer the average grind becomes, but there’s no control over consistency. Each batch contains a wide range of particle sizes: some large chunks that barely extract, some near-powder that over-extracts in seconds. This is why blade-ground coffee often tastes both sour and bitter simultaneously — a combination that has no clean fix through brew adjustments.
Blade grinders also generate heat through friction, which can slightly degrade volatile aromatics in the beans. For pour-over especially, where grind consistency is critical to an even, controlled extraction, blade grinders produce results that can’t be dialed in no matter how carefully you pour.
🔬 If your coffee tastes both sour and bitter at the same time: this is the classic blade grinder signature. It’s not a recipe problem or a bean problem — it’s inconsistent particle size causing simultaneous under- and over-extraction. Upgrading to any burr grinder produces immediate improvement.
For a full side-by-side taste test breakdown, see our Burr vs Blade Coffee Grinders comparison.
Manual vs Electric Coffee Grinders
Once you’ve committed to a burr grinder, the next decision is whether to go electric or manual (hand-cranked). Both types use burrs and both produce excellent grind quality at their respective price points. The choice comes down to your lifestyle, budget, and brew habits.
| Factor | Electric Burr Grinder | Manual Burr Grinder |
|---|---|---|
| Effort per use | Push a button | 1–3 min hand cranking per dose |
| Speed | 10–40 seconds | 60–180 seconds |
| Best for | Multiple cups daily, households, ease | Single-cup brewing, travel, apartments |
| Noise | Moderate to loud | Near-silent |
| Grind quality per $ | Good from ~$80+ | Excellent from ~$40+ |
| Portability | Counter-only | Bag-friendly, no power needed |
| Durability | Good; motor parts add complexity | Excellent; few moving parts |
Electric Burr Grinders: Best for Daily Use and Multi-Cup Brewing
Electric burr grinders are the right choice for most home brewers who make 2+ cups daily and value convenience. Push a button, get consistent grounds in under a minute. They handle large doses easily — a 40g French press dose takes seconds rather than minutes of hand-cranking. Entry-level electric burr grinders from Baratza and OXO start around $80–$100 and produce grind quality that will satisfy most beginners for years.
- Best for: daily drip, French press households, anyone making 2+ cups at once
- Budget entry point: ~$80 (OXO Brew Conical Burr)
- Upgrade sweet spot: ~$170 (Baratza Encore) — buy-once, repair-forever
Manual Burr Grinders: Best Value and Best for Travel
Manual burr grinders offer exceptional grind quality relative to their price. A $50–$70 hand grinder from Timemore or KINGrinder produces grind consistency that competes with electric grinders in the $100–$150 range. The tradeoff is effort: grinding a single 15g AeroPress dose takes 60–90 seconds; a 30g pour-over dose takes 2–3 minutes.
For single-cup brewers, apartment dwellers who can’t make noise early in the morning, or anyone who travels frequently with their coffee setup, a manual grinder is often the smarter first buy. They’re also virtually indestructible — no motor to burn out, no power dependency, and most models disassemble in seconds for cleaning.
- Best for: single-cup brewing, travel, apartments, quiet early mornings
- Entry point: Choose a current manual burr grinder with repeatable stepped adjustment rather than buying by price alone
- Current manual reference: KINGrinder K6 — external adjustment, 60 clicks per rotation
For a curated list of our favorite portable options, see Best Manual Coffee Grinders.
What Features Actually Matter for a First Coffee Grinder
Marketing copy for coffee grinders is full of impressive-sounding specs that don’t meaningfully affect beginner results. Here’s what actually matters versus what you can safely ignore.
✅ Features That Matter
Grind size adjustment range and resolution. Look for clearly defined, repeatable settings that span from coarse (French press) to medium-fine (pour-over, AeroPress). Click-based or stepped adjustment is more reliable than stepless for beginners — you can find a setting, remember it, and return to it. Aim for at least 30–40 distinct settings across the range.
Consistency. This is the core variable. A grinder that produces even particle sizes at a modest price point will outperform a fancier grinder with poor consistency. Read reviews specifically for grind uniformity — not just taste notes.
Ease of cleaning. Coffee oils go rancid and build up on burrs over time. Grinders that disassemble easily — most decent burr grinders do — allow for monthly cleaning that keeps grind quality consistent.
Grounds retention. Some grinders retain several grams of old grounds in their chute between uses. Low retention means fresher grounds in your cup and less wasted coffee. Manual grinders tend to have near-zero retention.
Repairability (for electric models). Baratza is the gold standard here — they sell spare parts directly and have repair guides online. A grinder you can maintain for 10 years is a better investment than a cheaper one you’ll replace in 2.
❌ Features You Can Safely Ignore as a Beginner
Built-in scales. Useful at a higher tier, but adds cost and a failure point. Use a separate $15 scale — you’ll get better accuracy and it works with any grinder.
RPM specifications. Lower RPM generates less heat, which is theoretically better for aromatic preservation. In practice, the difference at home-brewing scales is negligible compared to the impact of grind consistency.
Dose timers on electric grinders. Convenient, but time-based dosing is less accurate than weight-based dosing. Learn to weigh your dose first.
Premium burr coatings (titanium, DLC). These extend burr lifespan and can marginally reduce static. For a first grinder, burr geometry, alignment, adjustment, and workflow matter more than paying extra for a premium coating.
How Much Should You Spend on Your First Coffee Grinder?
Do not anchor the decision to one permanent dollar amount. Grinder prices move, and manual and electric models have very different cost structures. Instead, decide which capability tier you actually need.
| Buying tier | What you should get | Example | Who it suits |
|---|---|---|---|
| Skip the blade-grinder tier | Save for a true burr grinder with repeatable adjustment | — | Anyone who wants to learn extraction rather than guess |
| Manual value | Fine adjustment, portability, compact storage | KINGrinder K6 | One- or two-cup brewers, travel, small kitchens |
| Lower-cost electric | Push-button convenience and a useful filter-coffee range | OXO Brew Conical Burr | Daily drip and filter coffee |
| Serviceable electric | Repeatable settings, parts availability, easy daily workflow | Baratza Encore | Beginners who expect to brew regularly for years |
| All-purpose step-up | Broader grind range and finer control, including espresso capability | Fellow Opus 2 | Beginners who expect to explore several brew methods |
Value rule: pay for the adjustment range, workflow, serviceability, and brew methods you will actually use. Check current retail pricing when comparing models rather than relying on a fixed price band from an older guide.
Best Coffee Grinders for Beginners: Current Shortlist
These are useful reference points for three different beginner workflows. Prices and retailer stock change, so the comparison focuses on adjustment design, brew range, and day-to-day use.
Baratza Encore — Serviceable Electric Starting Point
The Encore is a straightforward filter-focused electric grinder with 40 numbered settings, a 40mm M3 conical steel burr, a DC motor, and a 300g hopper. Its strongest beginner advantage is Baratza’s long-running parts and repair ecosystem.
- Best for: drip, pour-over, AeroPress, and French press
- Adjustment: 40 numbered settings
- Beginner advantage: simple workflow and serviceability
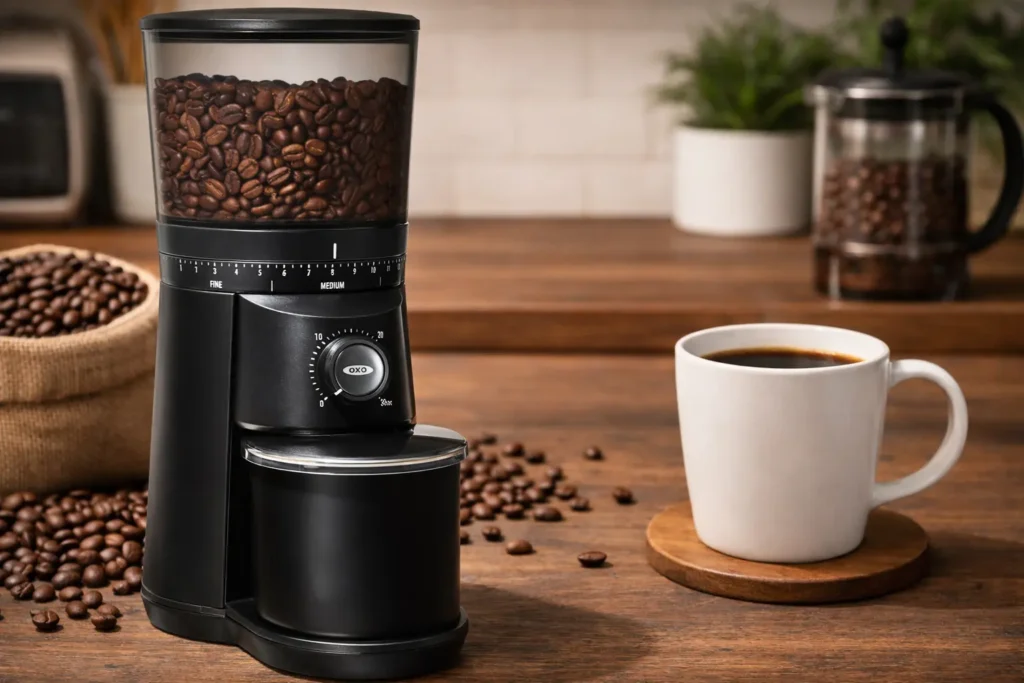
OXO Brew Conical Burr Grinder — Simpler Lower-Cost Electric Route
OXO uses stainless-steel conical burrs with 15 main settings plus microsettings. The one-touch timer remembers the previous setting, and OXO’s guidance places pour-over and drip in the medium portion of the dial.
- Best for: everyday drip and filter coffee
- Adjustment: 15 settings plus microsettings
- Beginner advantage: simple controls and repeatable timer workflow
KINGrinder K6 — Manual Option With Fine External Adjustment
KINGrinder specifies a 48mm heptagonal stainless-steel burr, 60 clicks per rotation, and 16μm movement per click. The range extends from espresso-fine through coarse brewing.
- Best for: one- or two-cup brewing, travel, pour-over, AeroPress, and buyers willing to hand grind
- Adjustment: external dial, 60 clicks per rotation
- Beginner advantage: precise adjustment without a motorized countertop appliance
What about Fellow Opus 2?
Fellow replaced the original Opus concept with Opus 2 in 2026. The current model uses 48mm conical burrs, a stepless side dial, a redesigned low-retention grind path, and a full-spectrum range intended for espresso through cold brew. It is a useful step-up option when you already know you want one electric grinder to explore both espresso and filter coffee. The old Opus affiliate link is not being reused as though it were the current model.
Beginner Grinder Comparison
| Grinder | Format | Adjustment | Best fit | Main trade-off |
|---|---|---|---|---|
| Baratza Encore | Electric | 40 numbered settings | Regular filter-coffee use and serviceability | Not optimized for high-resolution espresso dialing |
| OXO Brew Conical Burr | Electric | 15 settings plus microsettings | Simple drip/filter workflow | Less adjustment range than step-up grinders |
| KINGrinder K6 | Manual | 60 clicks per rotation; 16μm per click | Portable, quiet, multi-method manual grinding | Requires hand grinding |
| Fellow Opus 2 | Electric | Stepless | One electric grinder for espresso through cold brew | Step-up purchase rather than a necessary first grinder |
Common Beginner Mistakes When Choosing a Coffee Grinder
These are the most frequent missteps — knowing them before you buy will save you money and frustration.
Buying an Espresso-Focused Grinder Too Early
Espresso requires extremely fine, precise grinding — and espresso grinders are engineered for exactly that narrow range. They’re poor at medium and coarse settings, which means they can’t do drip, pour-over, or French press well. Espresso also requires a capable espresso machine and a finer-grained dialing workflow. If you’re not already committed to the full espresso setup, a general-purpose burr grinder is a practical starting point.
Choosing a Blade Grinder for Pour-Over or AeroPress
Pour-over and AeroPress are the two brew methods most sensitive to grind consistency. Blade grinders produce the most inconsistent grind of any type. The combination means you’ll get unpredictable, hard-to-improve results regardless of how carefully you execute the rest of the recipe. If your primary brew method is pour-over, a burr grinder is essentially mandatory.
Overspending on Advanced Features You Won’t Use Yet
Features like built-in scales, programmable dosing, and premium burr materials can add value later. As a beginner, prioritize repeatable burr adjustment and a workflow you will actually use; you can decide which premium features matter after brewing with the basics.
Ignoring Grind Size Adjustment Range
Some cheap burr grinders have limited adjustment range — they cover medium grind well but can’t go coarse enough for French press or fine enough for AeroPress concentrate. Always check that a grinder covers the full range you need before buying.
Upgrading the Brewer Before the Grinder
An expensive brewer cannot compensate for stale pre-ground coffee or wildly inconsistent blade-ground particles. If your brewer is already functional, grind freshness and repeatability are often the more useful first upgrade.
Troubleshooting Your First Grinder: Common Problems and Fixes
Use this table as a quick reference when something tastes off. Start with grind adjustments before changing other variables.
| Symptom | Most likely cause | Fix (in order) |
|---|---|---|
| Sour, thin, or hollow | Under-extraction: grind too coarse | Grind 1–2 steps finer → brew slightly longer → raise water temp |
| Bitter, harsh, or drying | Over-extraction: grind too fine | Grind 1–2 steps coarser → shorten brew time → lower water temp |
| Simultaneously sour and bitter | Inconsistent grind (boulders + fines) | Upgrade to burr grinder — this is the classic blade grinder signature |
| Muddy or silty cup | Fines passing through filter | Use paper filter → reduce agitation/stirring → go 1 step coarser |
| Balanced but weak | Strength issue (not extraction) | Add 1–2g more coffee or reduce water — do not change grind |
| Coffee tastes flat despite fresh beans | Stale grind, old burrs, or retained grounds | Clean burrs with brush → grind a small amount and discard → check roast date |
| Grind size feels random between uses | Setting slipping on grinder | Tighten adjustment mechanism → mark your setting with tape |
FAQs
Is a burr grinder worth it for a beginner?
Can beginners use a manual coffee grinder?
Do beginners need an expensive grinder?
What grind size is best for drip coffee?
What grind size is best for pour-over?
Can one grinder cover filter coffee and espresso?
How often should I clean my coffee grinder?
Should I upgrade the grinder before the brewer?
CoffeeGearHub shortlist
Compare CoffeeGearHub product pages
Review specifications and current verified merchant offers on CoffeeGearHub before leaving the site.