
Pour-Over Coffee Brewing Setup
Editorial standards: equipment roles, brewing variables, manufacturer specifications, workflow, maintenance, cost, and product limitations are separated where relevant.
At a glance
What this guide covers
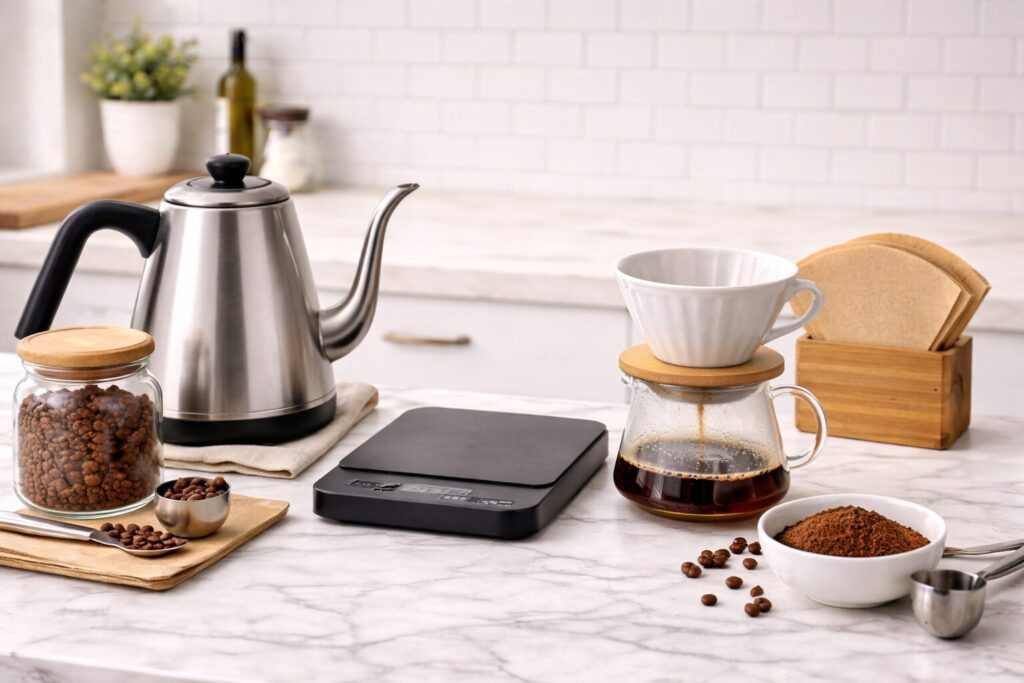
This guide builds a complete pour-over setup around the pieces that affect extraction most: burr grinder, scale, gooseneck kettle, dripper, filters, and water. It also explains what to buy first, how much to spend, and how to dial the system in once the equipment is on the counter.
Editorial analysis
Build the system in priority order
A pour-over setup should be built around repeatability rather than the number of accessories. Put the grinder and scale first, add controlled water delivery, then choose a brewer and filter format you will actually use. Once those variables are stable, upgrades become easier to evaluate because the baseline is no longer moving.
What Matters Most in a Pour-Over Setup
When the same coffee produces noticeably different cups from one brew to the next, the problem is usually not a missing accessory. It is an uncontrolled variable. Grind distribution, dose and water measurement, pour rate, filter choice, and water chemistry all influence extraction, but they do not deserve equal spending priority.
The most useful way to build a setup is to remove uncertainty in stages. A capable burr grinder makes particle size more consistent, while a scale tells you whether you actually repeated the same recipe. A gooseneck kettle then improves water delivery and, in electric models, temperature repeatability. The dripper and filter shape the cup profile after those fundamentals are under control.
That order matters more than price. A modest brewer paired with a consistent grinder and measured recipe usually gives you more control than an expensive dripper paired with uneven grounds and guessed water volumes. Filtered water belongs in the same system: if the water carries chlorine, metallic flavors, or extreme mineral character, equipment changes cannot fully compensate for it.
Where each component earns its place
The table below is a decision framework rather than a shopping checklist. If you already own a component that performs its job reliably, keep it and move to the next source of inconsistency.
| Gear | Priority | What it changes | Minimum spec | Skip if… |
|---|---|---|---|---|
| Burr grinder | 1st | Extraction evenness → flavor clarity + sweetness | Conical or flat burrs; fine-step adjustment | You already own one |
| Digital scale + timer | 2nd | Repeatability → consistent cups day to day | 0.1g resolution; built-in timer | Never |
| Gooseneck kettle | 3rd | Pour evenness → no channeling; temp control (electric) | Curved gooseneck spout; variable temp for electric | Already have one |
| Dripper | 4th | Flow rate and extraction style → cup profile | Cone or flat-bottom; matches available filters | Already have one |
| Paper filters | 4th | Oil and fines filtration → clarity and mouthfeel | Matching size for your dripper | Using metal filter by choice |
| Filtered water | 5th | Off-note removal → cleaner baseline | 75–150 ppm TDS, near-neutral pH | Your tap water already tastes neutral |
Editorial takeaway: spend first on repeatability, not prestige. The grinder and scale give you the clearest feedback loop; the kettle and brewer then make that repeatability easier to execute.
Useful setup essentials
Four tools that remove the biggest pour-over variables
A capable burr grinder, accurate scale, controlled kettle, and predictable dripper make the rest of the brewing process easier to repeat and diagnose.
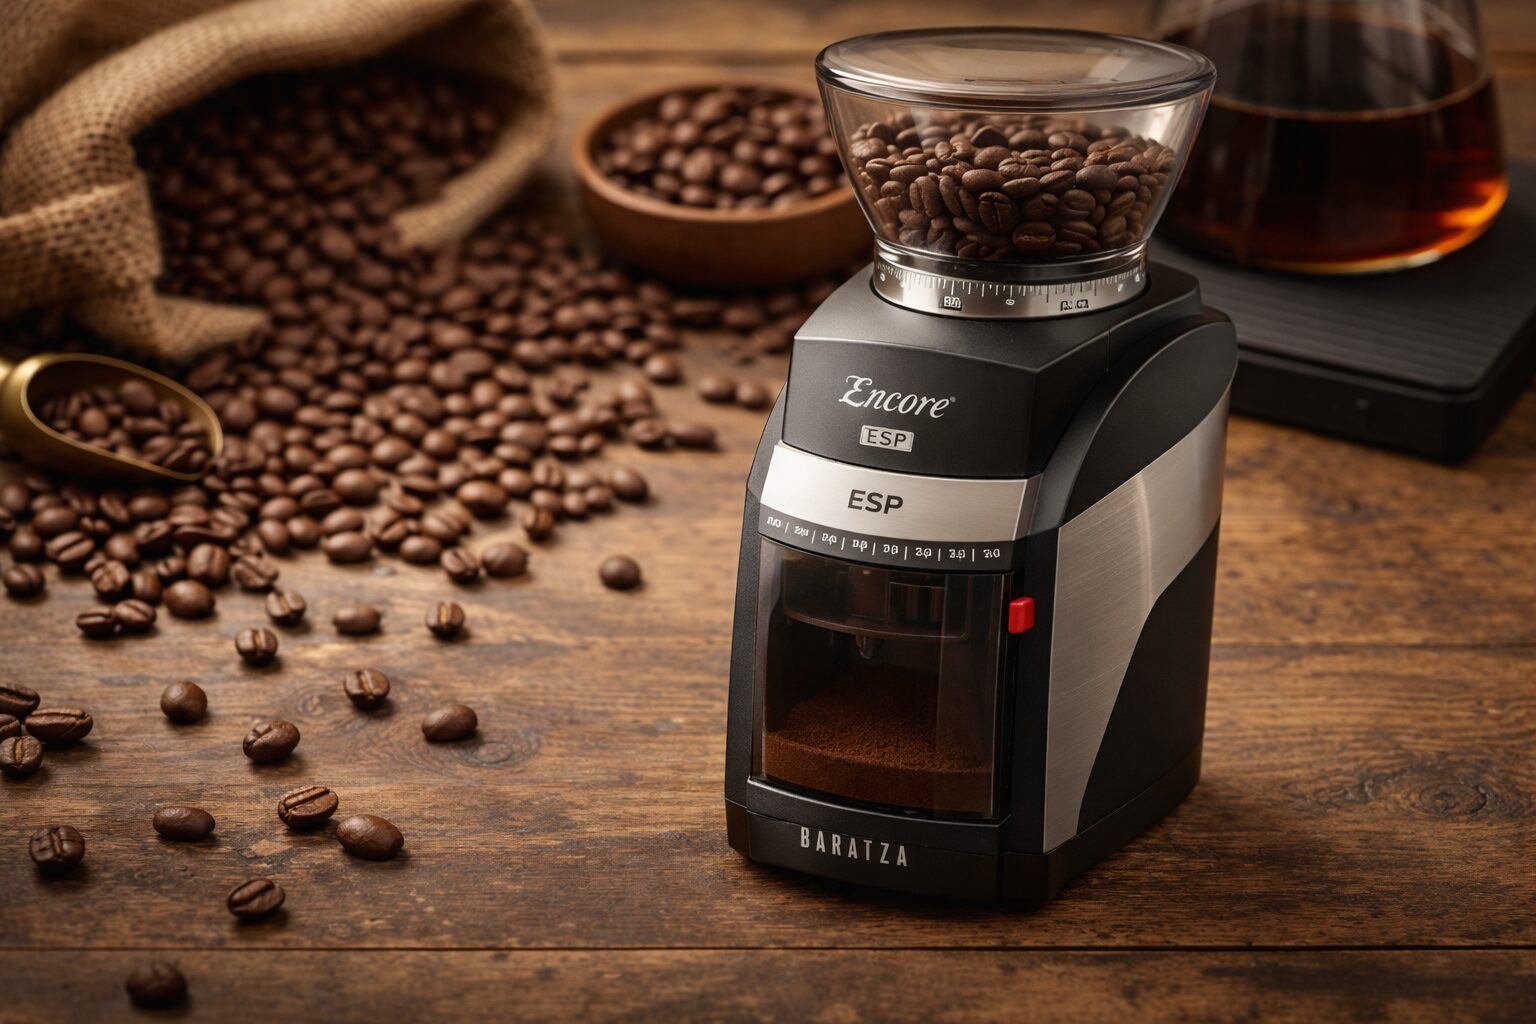 Baratza Encore ESPElectric burr grinder with useful adjustment range for filter coffee and broader home brewing.View on Amazon →
 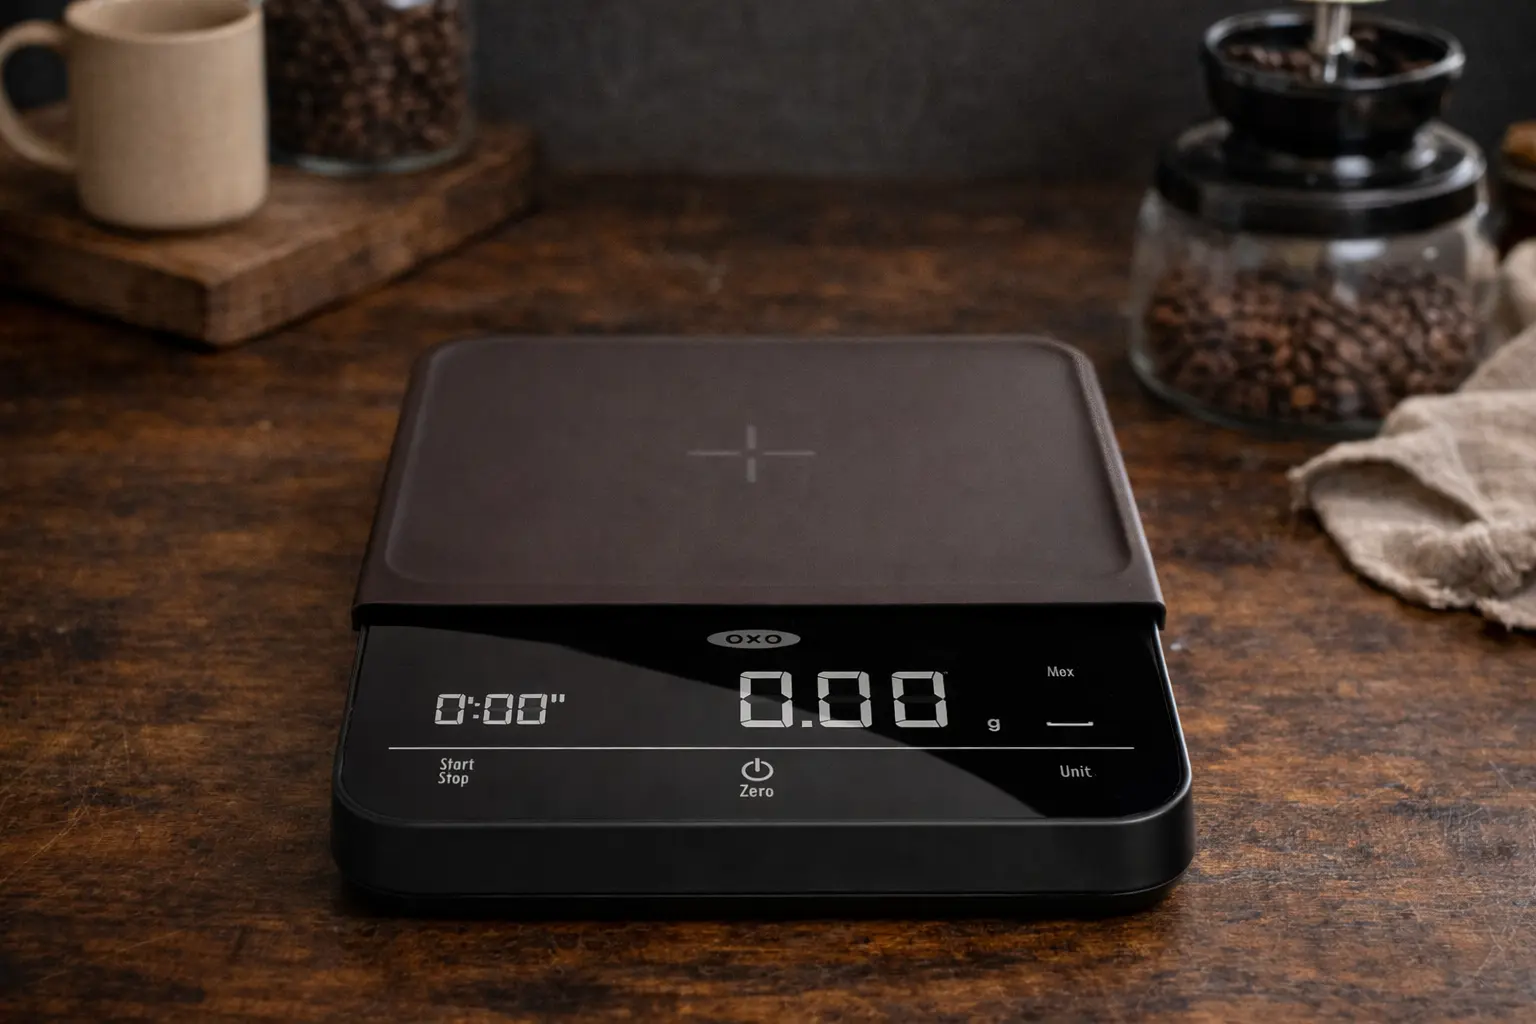 Coffee Scale + TimerTracks dose, water weight, and brew time so recipes are repeatable instead of estimated.View on Amazon →
 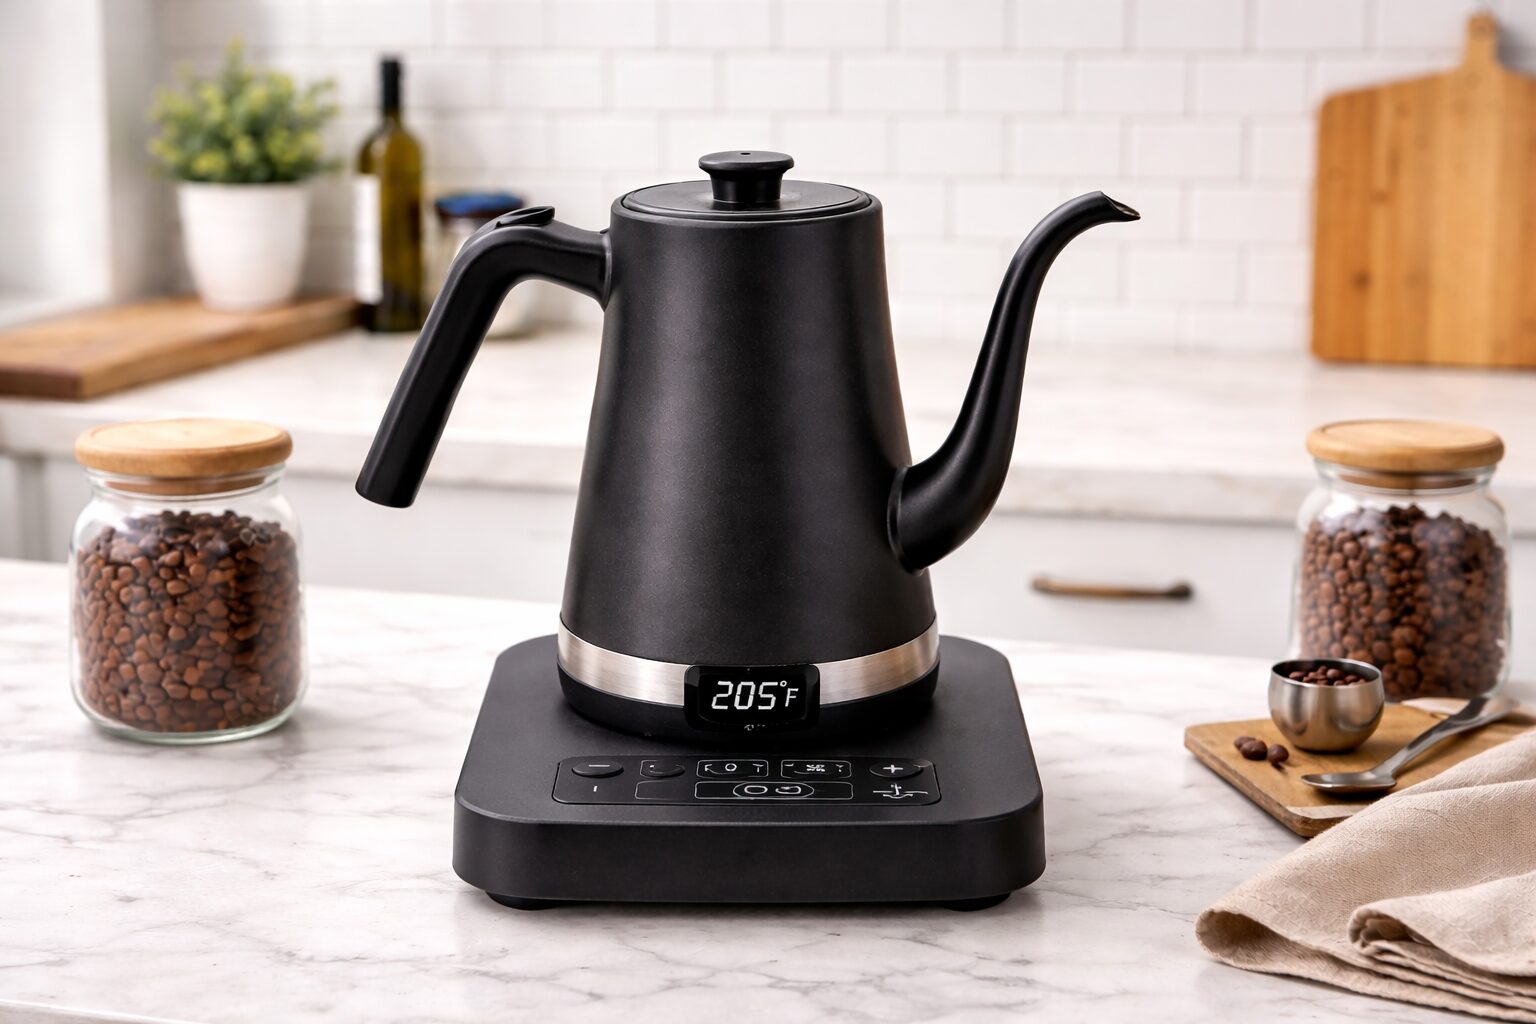 Fellow Stagg EKGVariable-temperature gooseneck kettle for more controlled flow and repeatable water temperature.View on Amazon →
 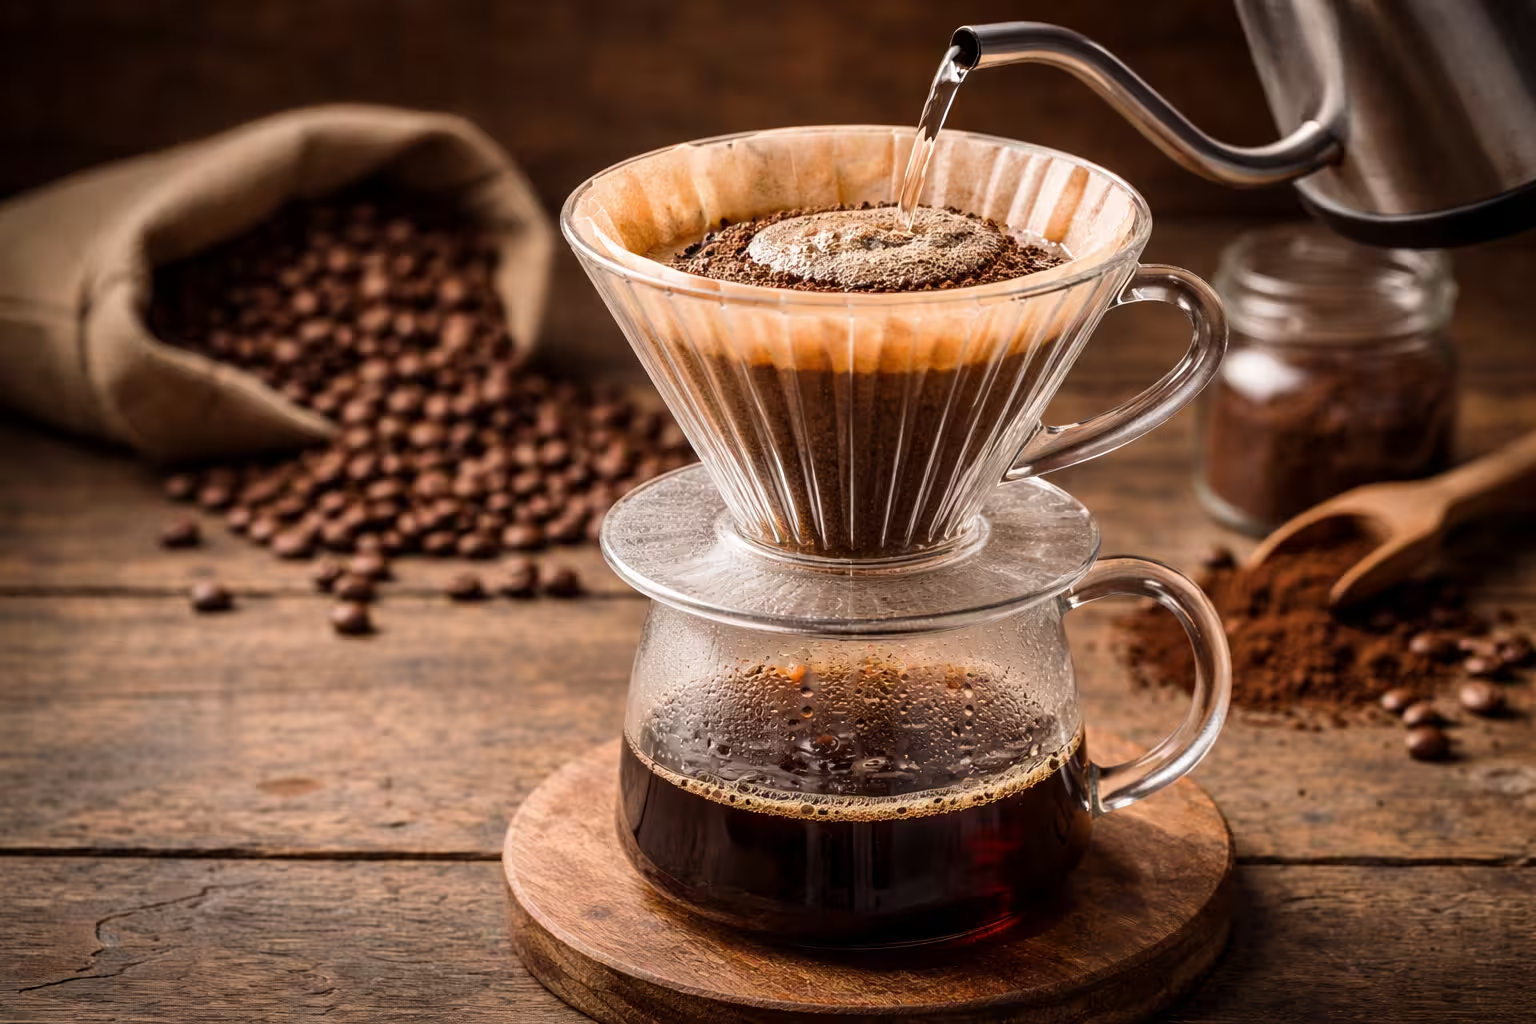 Pour-Over DripperA predictable brewer such as a V60 or flat-bottom dripper gives you a stable platform for dialing in.View on Amazon →
Affiliate disclosure: These links may earn CoffeeGearHub a commission at no additional cost to you. As an Amazon Associate, we earn from qualifying purchases. Prices and availability can change.
How Pour-Over Extraction Actually Works
Pour-over is a percolation brewer: hot water passes through a bed of ground coffee, dissolving soluble compounds as it flows, then drains through a filter. Unlike immersion methods (AeroPress, French press), extraction happens continuously and progressively from the moment water contacts grounds to the moment the last drop drains.
Compounds extract in a predictable sequence: bright acids and salts come out first, sweetness and “coffee flavor” come next, and bitter/astringent compounds extract last. The goal is to stop the flow in the sweet spot — past the hollow early-extraction zone, before the harsh over-extraction zone.
Extraction tends to move from brighter acids and salts toward sugars and aromatics, with more bitter and drying compounds becoming prominent later. That sequence is useful as a diagnostic idea, but it is not a stopwatch: uneven particle size can produce early and late extraction flavors in the same cup at the same time.
Grind size controls surface area and diffusion distance — finer grinds extract faster by exposing more surface to water; coarser grinds slow extraction. Water temperature accelerates or slows solubility. Pour technique (flow rate and evenness) controls contact time and prevents channeling — the single biggest source of inconsistency in pour-over specifically.
🔬 If your cup tastes simultaneously sour and bitter: that’s the classic blade-grinder symptom — fine powder over-extracting while coarse chunks under-extract in the same dose. It’s the #1 sign a burr grinder upgrade will produce immediate, dramatic improvement.
Why the Grinder Usually Deserves the First Upgrade
Pour-over is unusually sensitive to particle-size distribution because fresh water is continuously passing through the coffee bed. If one dose contains a large amount of powder alongside much larger fragments, the smallest particles can over-extract while the largest remain under-extracted. The result can taste sharp and drying at the same time, and no pouring pattern can fully correct it.
Manual and electric burr grinders solve the same problem with different trade-offs. A good hand grinder can deliver excellent grind consistency for relatively little money and takes up very little counter space, but it adds physical effort to every brew. Electric grinders cost more for comparable burr quality, yet make more sense when several cups are prepared each day or when convenience determines whether the routine is sustainable.
When comparing grinders, focus on the mechanics that affect repeatability: true burrs rather than blades, sufficiently small adjustment steps, a rigid burr assembly, and a workflow that does not leave excessive stale coffee trapped inside. Those characteristics matter more to pour-over than cosmetic features or a long settings list. For model-level comparisons, see Best Burr Grinders for Pour-Over.
Coffee Scale + Timer: Your Shortcut to Consistency
Pour-over is controlled extraction — and you can’t control what you can’t measure. A scale lets you repeat your best cup exactly: same dose, same yield, same timing. Without one, small errors in measurement compound across every brew variable and you can’t tell whether a change in taste came from a grind adjustment or a dose inconsistency.
To dial in reliably, a digital scale and a temperature-controlled kettle remove guesswork so grind and technique changes give clean, isolated feedback.
Gooseneck Kettle: Control the Pour, Control the Cup
A gooseneck kettle solves a problem most beginners don’t realize they have: uncontrolled water flow. A standard kettle dumps water too fast and too hard, blasting channels through your coffee bed and causing uneven extraction — thin, sharp cups even from quality beans and a good grinder. The gooseneck’s long, curved spout slows and precisely directs the pour.
Electric gooseneck kettles with variable temperature control are the gold standard for daily pour-over use. You set the temperature, it holds it while you grind — no thermometer, no timing your cool-down. Stovetop gooseneck kettles cost less and are more durable, but you’ll need a thermometer to dial water temperature accurately.
Target water temperature for pour-over: 195–205°F (90–96°C). Light roasts do better at the hotter end; dark roasts taste cleaner toward the cooler end. 200°F (93°C) is the safe default for medium roasts.
Cone vs Flat-Bottom Drippers: What Changes in the Cup
The dripper shape controls how water flows through the coffee bed, which directly affects extraction evenness and flavor profile. There’s no universally best dripper — there’s the best match for how you like coffee to taste and how carefully you want to pour.
| Feature | Cone Drippers | Flat-Bottom Drippers |
|---|---|---|
| Cup profile | Bright, clean, high-definition | Rounder, sweeter, more body |
| Flow rate | Faster (single large drain hole) | Slower (multiple small holes) |
| Extraction style | Higher — emphasizes clarity and acidity | More even — softer, balanced extraction |
| Pour sensitivity | Higher — rewards careful technique | Lower — more forgiving for beginners |
| Best for | Light/medium roasts, fruit and floral notes | Medium/dark roasts, chocolate and nutty notes |
| Popular models | Hario V60, Origami, April | Kalita Wave, Orea, Stagg [X] |
| Price range | $10–$80+ | $25–$100+ |
💡 Beginner recommendation: Start with a flat-bottom dripper (Kalita Wave) or a plastic V60. Both are inexpensive, widely documented, and have huge communities of recipes and dial-in advice behind them. See all picks: Best Pour-Over Coffee Makers (2026).
Choose the Filter for the Cup Profile You Want
Filter material changes more than convenience. It controls how much oil and fine material reaches the cup, which changes clarity, body, texture, and sometimes the grind or agitation that works best. Paper is the easiest baseline because it produces a clean cup and makes changes in grind easier to taste. Metal emphasizes body and oils, while cloth sits between the two but requires more care.
| Filter | Typical cup character | Brewing adjustment | Maintenance |
|---|---|---|---|
| Paper | High clarity, lighter body, very low sediment | Use as the baseline; rinse before brewing to remove paper flavor and preheat the brewer | Single use |
| Metal | More oils, fuller body, more fine sediment | Often benefits from a slightly coarser grind and gentler agitation | Rinse thoroughly after every brew |
| Cloth | More body than paper with good clarity | Start near the paper recipe and adjust by taste | Rinse, store carefully, and replace when odors or staining persist |
There is no universally superior filter. Use paper when you want maximum clarity and a straightforward dial-in process; choose metal or cloth when their added body is part of the cup style you are deliberately trying to create.
Treat Water as a Brewing Variable, Not a Brand Choice
Coffee is mostly water, so obvious chlorine, metallic flavors, or extreme mineral character will show up in the cup. The practical first experiment is usually simple: compare your normal tap water with a clean-tasting filtered source while keeping the coffee recipe unchanged. If the cup becomes clearer or sweeter, water was part of the problem.
TDS can be useful for tracking whether a water source has changed, but it does not tell you hardness, alkalinity, or which minerals are present. Very low-mineral distilled or reverse-osmosis water can taste thin unless it is remineralized, while very hard or highly alkaline water can mute acidity and make extraction changes harder to read. A pleasant, consistent filtered or spring water is often a better baseline than chasing one supposedly perfect ppm number.
| Water situation | What you may notice | Practical response |
|---|---|---|
| Chlorinated or metallic tap water | Obvious off-flavors that remain despite grind changes | Try carbon-filtered water before changing coffee gear |
| Very low-mineral distilled / RO water | Thin or unusually flat extraction | Use a remineralized recipe or blend with suitable mineral-containing water |
| Clean-tasting filtered or spring water | Stable, neutral baseline | Use it consistently and evaluate the coffee from there |
| Very hard / highly alkaline water | Muted acidity and less responsive dial-in | Compare with a softer filtered source and judge by taste |
For a deeper treatment of hardness, alkalinity, filtration, and TDS, see Coffee Water Quality: Hardness, Minerals & Better Flavor.
Budget Tiers: Beginner to Enthusiast Setup
You don’t need to buy everything at once. Each tier produces noticeably better coffee than the one below it. The biggest jump happens when you go from no burr grinder to any burr grinder — everything else is refinement on top of that foundation.
| Tier | Budget | Grinder | Kettle | Dripper | Scale | What you get |
|---|---|---|---|---|---|---|
| Starter | ~$60–80 | Entry hand burr grinder | Stovetop gooseneck + thermometer | Plastic V60 01/02 | Basic kitchen scale | Dramatically better than drip or pods — real flavor clarity |
| Mid-Range | ~$150–200 | Quality hand grinder (e.g., Timemore C3) | Electric gooseneck with temp control | Ceramic V60 or Kalita Wave | Coffee scale with timer (0.1g) | Café-quality at home — consistent, clean, repeatable every brew |
| Enthusiast | ~$400–600+ | Electric burr grinder (e.g., Fellow Opus, Baratza Encore) | Variable temp electric with hold (e.g., Fellow Stagg EKG) | Premium dripper (Origami, April, Stagg [X]) | High-refresh scale (e.g., Acaia Pearl) | Full variable control — for those who genuinely geek out on coffee |
💡 Best value upgrade path: Start at Starter tier, then replace the grinder first with a quality hand burr grinder. That single swap — blade grinder to burr grinder — is the largest single jump in cup quality you will ever experience at home.
Dial In From a Control, Not From a Collection of Recipes
A repeatable control recipe gives every adjustment a reference point. The numbers below are not a universal definition of good pour-over; they are a practical starting configuration that makes changes in grind easy to taste.
| Variable | Starting point |
|---|---|
| Coffee | 20g |
| Water | 320g filtered |
| Ratio | 1:16 |
| Water temperature | About 200°F / 93°C |
| Filter | Rinsed paper |
| Bloom | 50–60g for roughly 30–45 seconds |
| Total drawdown | Use roughly 2:45–3:30 as a diagnostic window, not a rigid target |
Keep dose, total water, and pouring pattern stable while you adjust grind. If the cup is sharply sour or hollow, move finer in a small step. If it is drying or unpleasantly bitter, move coarser. If the flavor is balanced but simply too weak or too strong, treat that as a strength problem and change the ratio or dose rather than using grind to solve the wrong variable.
The fastest useful testing routine is simple: brew the control recipe, record total drawdown and a short taste note, change the grind by one small increment, and repeat. Two or three brews will usually tell you whether you are moving in the right direction even if the coffee is not fully dialed in yet. Temperature and pouring technique are better used for fine-tuning after grind has moved the cup into the right neighborhood.
Two practical starting styles
| Daily sweet cup | Stronger / milk-friendly cup | |
|---|---|---|
| Coffee | 20g | 22–24g |
| Water | 320g | 330–360g |
| Ratio | About 1:16 | About 1:15 |
| Temperature | About 200°F / 93°C | About 200–203°F / 93–95°C |
| Grind tendency | Medium to medium-fine | Slightly finer than the daily-cup baseline |
| Use when | You want clarity, sweetness, and an easy diagnostic baseline | You want more concentration or plan to add milk |
These are starting styles, not fixed recipes. Let taste decide the final grind, temperature, and ratio for the coffee in front of you.
Brew Ratio Scaling Table
Once your 1:16 recipe is dialed in, scaling for cups or adjusting strength is simple. Keep the ratio fixed and change the dose — the method and timing stay the same.
| Cups | Coffee (g) | Water (g) | Ratio | Strength |
|---|---|---|---|---|
| 1 small (6 oz) | 11g | 175g | 1:16 | Standard |
| 1 standard (10 oz) | 18g | 285g | 1:16 | Standard |
| 1–2 cups (12 oz) | 20g | 320g | 1:16 | Standard (baseline recipe) |
| 2 cups (16 oz) | 25g | 400g | 1:16 | Standard |
| Carafe (24 oz / 700ml) | 44g | 700g | 1:16 | Standard |
| Strong single | 20g | 300g | 1:15 | Strong |
| Light single | 20g | 340g | 1:17 | Light / tea-like |
Use Roast Level as a Starting Cue, Then Let Taste Override It
Roast labels are broad categories, but they can still help choose an initial direction. Lighter coffees often tolerate hotter water and a somewhat finer grind because their soluble material is harder to extract; darker coffees usually need less aggressive extraction. Treat these as starting tendencies rather than rules.
| Roast tendency | Grind starting direction | Temperature starting range | What to watch for |
|---|---|---|---|
| Light | Slightly finer than the baseline | About 202–205°F / 94–96°C | If the cup is sharp or hollow, increase extraction gradually |
| Medium | Baseline medium to medium-fine | About 198–202°F / 92–94°C | Use this as the neutral starting point and adjust by taste |
| Dark | Slightly coarser than the baseline | About 195–199°F / 90–93°C | If the finish turns harsh or roasty, reduce extraction pressure |
Drawdown time is useful context, but flavor has the final vote. A coffee that tastes balanced outside a published time range does not need to be “corrected” simply to match the clock.
Troubleshooting Matrix: Taste → Fix
Start with grind. Use temperature and technique only after grind is close. Change one variable per brew.
| Symptom | What it usually means | Fix (in order) |
|---|---|---|
| Sour + drains fast (<2:30) | Too coarse / under-extracted | Finer → raise temp (light roasts) → pour slower |
| Bitter + drains slow (>3:45) | Too fine / over-extracted | Coarser → lower temp (dark roasts) → pour faster |
| Muddy / cloudy / gritty | Fines in cup, aggressive pour, or metal filter | Rinse paper filter → swirl pour only → slightly coarser |
| Balanced but weak / watery | Strength issue — not extraction | Increase dose (+1–2g) or reduce water — don’t change grind |
| Papery / cardboard taste | Filter not rinsed | Always rinse paper filter with hot water before brewing |
| Flat / no sweetness despite correct draw-down | Stale beans or poor water quality | Check roast date (use within 2–6 weeks); switch to filtered water |
| Drains too fast (<2:30) | Grind too coarse | Grind finer in small increments until draw-down slows |
| Drains too slow (>3:45) | Grind too fine or fines clogging filter | Grind coarser; level coffee bed before blooming |
| Sour AND bitter simultaneously | Inconsistent particle distribution — blade grinder | Upgrade to a burr grinder — see the setup recommendations above |
| Inconsistent cup day to day | No scale; variable dose and yield | Add a scale; weigh dose and water every brew |
Final Takeaway
Grinder first, always. Scale second. A controlled pour third. Everything after that is refinement on a solid foundation. Get the grind consistent, measure dose and yield, and pour gently — and you’ll brew pour-over that tastes cleaner, sweeter, and more intentional than most specialty café drip at a fraction of the cost.
FAQs
Do I really need a gooseneck kettle for pour-over coffee?
Yes, if you want consistent results. A gooseneck kettle gives you precise control over flow rate and pour direction, helping saturate the coffee bed evenly and preventing channeling. You can brew without one, but repeating great cups becomes significantly harder — especially with cone drippers like the V60.
What grind size is best for pour-over coffee?
Start at medium to medium-fine — a texture similar to coarse sand or table salt. If your coffee tastes sour or weak, grind slightly finer. If it tastes bitter or drying, grind slightly coarser. Always change one variable at a time and re-taste before adjusting again.
What coffee-to-water ratio should I use for pour-over?
A 1:16 ratio is the standard starting point — 20g of coffee to 320g of water. Adjust to 1:15 for a stronger cup, or 1:17 for a lighter, more tea-like brew. Keep the ratio fixed when scaling up to larger batches.
Why does my pour-over coffee taste bitter?
Bitterness means over-extraction. Most common causes: grind too fine, water too hot, or brew time too long (draw-down over 3:45). Start by grinding coarser and keep everything else the same.
Why does my pour-over coffee taste sour?
Sourness points to under-extraction. Common causes include grinding too coarse, water not hot enough (below 195°F), or a brew that drains too fast (under 2:30). Try grinding finer first, then check your water temperature.
Can I use a blade grinder for pour-over coffee?
Technically yes, but you’ll get inconsistent results. Blade grinders produce a wide range of particle sizes in the same dose. Fine particles over-extract (bitter) while coarse chunks under-extract (sour), giving you a confused, muddy cup. A burr grinder is the single most impactful upgrade you can make.
What water temperature is best for pour-over coffee?
Brew between 195–205°F (90–96°C). Light roasts prefer the hotter end; dark roasts often taste cleaner around 195–199°F. For medium roasts, 200°F (93°C) is a reliable, consistent starting point.
Should I use paper or metal filters for pour-over?
Paper filters produce a cleaner, brighter cup with less oil. Metal filters pass more oils through, adding body and texture. For beginners, start with paper — it’s more forgiving and makes it easier to taste what your grind and recipe are doing.
How long should a pour-over take from start to finish?
Target a total draw-down time of 2:45–3:30. If the dripper drains in under 2:30, your grind is too coarse. If it’s still draining past 3:45, your grind is likely too fine — try grinding coarser and ensuring a level coffee bed before you bloom.
What’s the best pour-over setup for beginners?
A quality hand burr grinder (~$50–80), a basic kitchen scale, a stovetop or entry-level electric gooseneck kettle, and a plastic Hario V60 or Kalita Wave with matching paper filters. This setup costs $80–120 total and produces dramatically better coffee than any pod machine or drip maker at the same price point.
CoffeeGearHub shortlist
Compare CoffeeGearHub product pages
Review specifications and current verified merchant offers on CoffeeGearHub before leaving the site.
Continue Learning
Use these guides to turn the setup into a repeatable brewing system and compare the components that matter most.
In this guide
- What Matters Most in a Pour-Over Setup
- How Pour-Over Extraction Actually Works
- Why the Grinder Usually Deserves the First Upgrade
- Coffee Scale + Timer: Your Shortcut to Consistency
- Gooseneck Kettle: Control the Pour, Control the Cup
- Cone vs Flat-Bottom Drippers: What Changes in the Cup
- Choose the Filter for the Cup Profile You Want
- Treat Water as a Brewing Variable, Not a Brand Choice
- Budget Tiers: Beginner to Enthusiast Setup
- Dial In From a Control, Not From a Collection of Recipes
- Brew Ratio Scaling Table
- Use Roast Level as a Starting Cue, Then Let Taste Override It
- Troubleshooting Matrix: Taste → Fix
- Final Takeaway
- FAQs