
How to Clean and Descale Your Keurig: Complete Maintenance Guide
Editorial standards: this guide separates manufacturer instructions, routine cleaning, descaling, troubleshooting, and CoffeeGearHub editorial guidance. Model-specific reset procedures can differ, so your brewer manual remains the final reference for required button sequences.
At a glance
What this guide covers
Daily and weekly cleaning, needle care, water-filter replacement, descaling intervals, vinegar versus descaling solution, persistent descale lights, slow brewing, and preventive maintenance.
Editorial analysis
Cleaning and descaling solve different problems
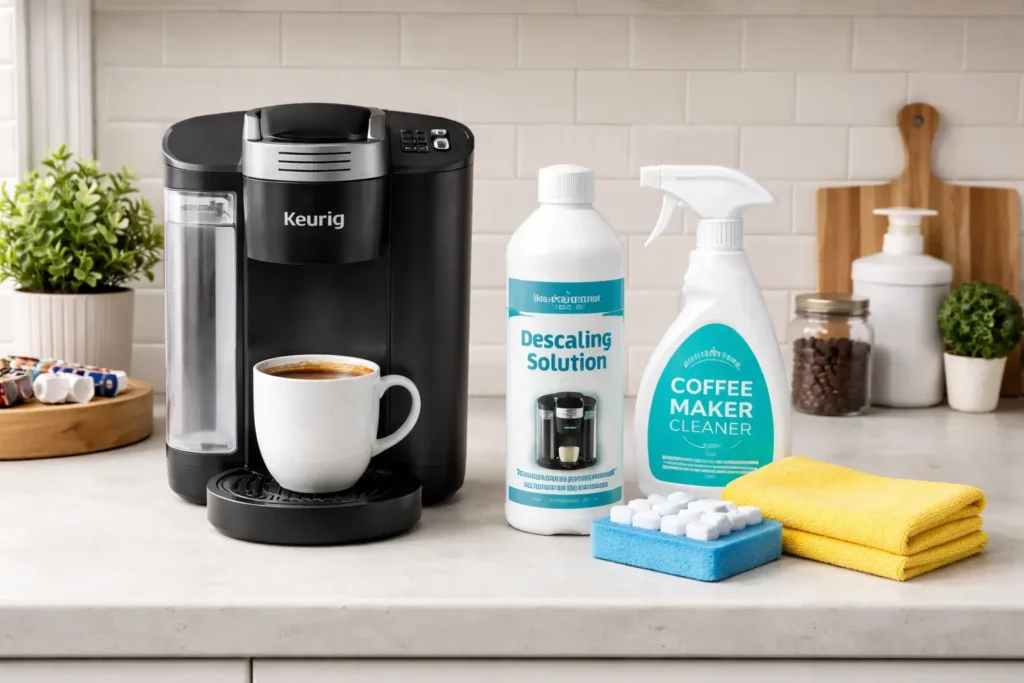
Routine cleaning removes coffee residue from removable parts, pod needles, and surfaces. Descaling targets mineral deposits inside the water path and heating system.
If a Keurig brews slowly, dispenses short cups, or shows a persistent descale warning, start with the least invasive maintenance step and then escalate to a full descale and model-specific reset guidance.
The 30-Second Answer
Clean removable parts and the pod area regularly, clean the needles when flow becomes inconsistent, and descale on a schedule that reflects your water hardness and usage. Many households land around every three to six months, while hard water and heavy daily use can justify a shorter interval.
Compare current options
Start with these representative choices
These two maintenance products cover the two problems most Keurig owners need to solve first: mineral scale inside the brewer and coffee-oil residue around the pod and brew path. Water-filter replacement is covered later in the guide where it belongs in the maintenance sequence.
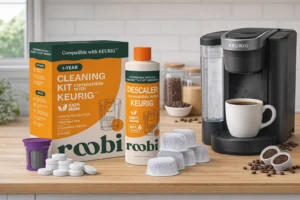
Keurig-Compatible Descaling Solution — For Mineral Scale
A liquid descaler designed to dissolve calcium and magnesium deposits inside the brewer’s water path.
Best starting point if: your Keurig is brewing slowly, dispensing short cups, or is due for its scheduled internal descaling cycle.

K-Cup Cleaning / Rinse Pods — For Coffee Residue
Rinse pods target coffee oils and flavored-drink residue around the brew head and exit path between deeper cleanings.
Best starting point if: taste, residue, or cross-flavor is the problem rather than mineral scale inside the machine.
Affiliate disclosure: Amazon links may earn CoffeeGearHub a commission at no additional cost to you. Prices, sellers, bundles, and availability can change.
Why Cleaning and Descaling Matter
A Keurig is built for convenience: fill the reservoir, pop in a K-Cup pod, press a button, and you have hot coffee in under a minute. That push-button ease is exactly why Keurig coffee makers are so popular, but it is also why cleaning a Keurig often gets ignored — the machine feels simple and self-contained, so many owners assume it barely needs maintenance.
In reality, every Keurig coffee maker needs regular cleaning and descaling just like any other brewer. Over time, water minerals build up inside the heating system and narrow internal tubes, coffee oils collect around the pod holder and exit needle, and moisture lingers in the reservoir and drip tray. If you never clean or descale your Keurig, those deposits start to affect coffee flavor, brew speed, temperature, and even how long the machine lasts.
That is why learning how to clean a Keurig and how to descale a Keurig properly matters. This is not just about wiping the outside so it looks nice on the counter. Keurig maintenance directly impacts how your coffee tastes, how reliably the machine brews each cup, and how often you run into annoying issues like slow brewing, lukewarm drinks, or a descale light that will not turn off.
What Builds Up Inside a Keurig
To maintain a machine well, it helps to understand what you are actually removing. Keurig brewers generally deal with three kinds of buildup: mineral scale, coffee oils, and moisture-related contamination.
| Type of buildup | Where it forms | Main problems it causes |
|---|---|---|
| Mineral scale | Internal water lines, heater, valves | Slow brewing, poor heating, pump strain |
| Coffee oils & residue | Pod holder, brew chamber, exit channels | Stale taste, bitterness, residue buildup |
| Standing moisture | Reservoir, drip tray, interior surfaces | Odor, mold risk, unsanitary conditions |
How Often You Should Clean a Keurig
The easiest way to keep your Keurig running like new is to treat cleaning as a quick, repeatable routine instead of a big project you only tackle when something goes wrong. A simple schedule keeps minerals, coffee oils, and stale water from ever reaching the point where they ruin the taste of your coffee or slow the machine down.
For most households, this practical Keurig maintenance schedule works well:
- Every day (takes seconds): Remove and discard used pods, empty the drip tray if it is filling up, and top off or replace the water in the reservoir so it is always fresh.
- Once a week: Remove the reservoir, lid, drip tray, pod holder, and funnel. Wash them with warm water and a little mild dish soap, rinse well, and let them air-dry completely before you put them back.
- Once a month: Check and clean the Keurig needles and pod holder so trapped grounds do not start causing weak, sputtering, or incomplete brews.
- Every 3 to 6 months: Run a full descaling cycle with a descaling solution to clear mineral scale from the internal water system.
If you brew several cups a day, use hard tap water, or notice your Keurig brewing more slowly or tasting “off” sooner than expected, shorten the descaling interval to every 2 to 3 months instead. Light daily and weekly cleaning keeps everything sanitary and fresh, while a deeper descaling a few times a year protects the inside of the machine and keeps each cup tasting like it should.
Best Products for Cleaning and Descaling a Keurig
You do not need a huge kit of specialty products to maintain a Keurig, but a few smart choices can make cleaning faster, more effective, and less frustrating. The recommendations below focus on the most common real-world problems: scale buildup, stale flavors, slow brewing, and recurring pod waste.
Keurig-Compatible Descaling Solution
This is the simplest option for removing internal mineral scale. Keurig’s own branded solution is formulated specifically for its brewers, while reputable compatible descalers can offer better value and multi-treatment packaging.
- Best for routine descaling every 3 to 6 months.
- Helps restore brewing speed, temperature, and cup volume.
- Usually leaves less odor than plain vinegar when rinsed thoroughly.
K-Cup Cleaning Pods / Rinse Pods
Cleaning pods look like regular K-Cups but contain a cleaning agent instead of coffee. Running one through the machine can help clear coffee oils and residue from the brew head and exit channels between full descaling cycles.
- Useful after flavored coffees, cocoa, or tea that leave more residue.
- Quick way to freshen taste if coffee begins to seem stale or “off.”
- They complement descaling; they do not replace it.
Keurig My K-Cup Reusable Coffee Filter
While it is not a cleaning product, a reusable K-Cup is one of the easiest upgrades for owners who want to use their own ground coffee, reduce single-use pod waste, and gain more control over strength.
- Lets you use your preferred ground coffee.
- Can reduce recurring pod waste and per-cup cost.
- Works well with the site’s guide to making stronger Keurig coffee.
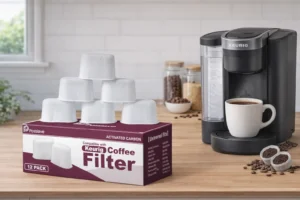
Keurig Water Filter Cartridges
Charcoal cartridges fit reservoir filter holders on compatible Keurig models. They can reduce chlorine, odors, and some minerals before the water reaches the brewer, which helps both flavor and routine maintenance.
- Designed for compatible Keurig reservoir filter holders.
- A common replacement interval is about two months or roughly 60 tank refills.
- Filtration can slow scale buildup but does not eliminate the need to descale.
Keurig Descaling Solution vs Third-Party Descalers
When it is time to descale a Keurig, you have two main approaches: Keurig’s branded descaling solution or a reputable third-party liquid, powder, or tablet descaler. The differences are mainly cost, convenience, and how closely you want to follow manufacturer-specific care guidance.
| Descaling option | Strengths and cautions | Best for |
|---|---|---|
| Keurig-branded solution | Manufacturer-specific directions and a straightforward care path; typically costs more per cycle. | Owners who want the simplest manufacturer-aligned option. |
| Third-party liquid descaler | Often cheaper per treatment and useful across several machines; dilution and quality vary by product. | Households with several coffee makers or frequent descaling needs. |
| Descaling tablets or powder | Compact, easy to store, and convenient for multiple treatments; must dissolve fully and may need extra rinsing. | People who prefer low-mess storage and pre-measured doses. |
If you are unsure where to start, the Keurig-branded solution is the simplest manufacturer-aligned choice. If you use a third-party product, follow both the descaler instructions and the brewer’s model-specific rinse procedure.
Daily and Weekly Cleaning Routine
The easiest way to keep a Keurig in good shape is to stop buildup before it becomes a real problem. Daily maintenance should take well under a minute, and weekly cleaning gives removable parts a proper reset.
- After your final brew each day: Remove and discard the used pod, empty the drip tray if it has collected coffee or rinse water, refresh the reservoir water if it has been sitting for more than a day, and wipe splashes around the brew head and exterior with a damp cloth.
- Once a week: Remove the reservoir, reservoir lid, drip tray, pod holder, and funnel. Wash them with warm water and mild dish soap, rinse thoroughly, and allow them to dry completely before reinstalling. Wipe the area around the brew head and inspect the pod holder for trapped grounds.
- As needed: If you see visible residue, staining, or smell any musty odor, repeat the weekly cleaning steps right away instead of waiting.
💡 Hygiene tip: Empty and air-dry the reservoir and drip tray if you will not use the machine for a few days. Less standing water means less chance for mold or odor to develop.
How to Clean the Keurig Needles
One of the most common Keurig issues has nothing to do with descaling at all — it is a clogged needle. Every time the brewer punctures a pod, tiny coffee particles can collect around the openings. Eventually, those particles can interfere with the water flow or the way the pod is pierced.
- Unplug and cool the machine. Always let the brewer cool before working near the needles.
- Remove the pod holder assembly. Pull the pod holder straight out of the brew head; most models let you separate the holder and funnel.
- Clear the top and bottom needles. Use a straightened paper clip or needle-cleaning tool and gently insert it into each needle opening to loosen trapped coffee particles. Use a light touch — the goal is to clear debris, not bend or damage anything.
- Rinse and reinstall. Rinse the pod holder and funnel thoroughly under running water, let them drain for a moment, then reinstall them in the machine.
- Run a water-only cycle. Run one or two brew cycles with plain water and no pod to flush out any loosened residue.
Cleaning the needles is a small maintenance step, but it solves a surprising number of day-to-day brewing issues like sputtering, incomplete cups, and sudden weak brews.
How to Replace the Keurig Water Filter
If your Keurig uses a water filter in the reservoir, changing it regularly is just as important as descaling. A fresh filter helps reduce mineral buildup, improves taste, and keeps dust or sediment from sitting in your tank. Most Keurig-style filters should be replaced about every two months or after roughly 60 tank refills — whichever comes first.
- Turn the machine off and remove the reservoir. Lift the water reservoir straight up and away from the base.
- Take out the filter holder. Gently pull the plastic handle or housing that contains the filter straight up from the tank.
- Open the filter holder. Remove or twist off the bottom cap to release the old charcoal cartridge.
- Discard the old filter. Throw away the used cartridge and rinse the holder if there is any loose carbon dust.
- Soak the new filter. Submerge the new cartridge in clean water for about 5 minutes to activate the charcoal.
- Rinse and assemble. Rinse the new filter under running water for 30 seconds, place it into the holder, and secure the bottom cap.
- Reinstall in the reservoir. Lower the holder back into its slot and press gently until it seats firmly.
- Fill and rinse brew. Reattach the reservoir, fill it with fresh water, and run a water-only cycle to flush any remaining carbon dust.
To make this easy to remember, pick a simple rule of thumb: change the water filter every two months, or every time you open a new big box of K-Cups.
How to Descale Keurig (Step-by-Step)
Descaling is the single most important maintenance task for long-term Keurig performance because it removes the internal mineral deposits that normal cleaning cannot reach. Soap and rinsing help on removable parts, but only a descaling solution (or vinegar in a pinch) dissolves the calcium and magnesium buildup inside the hidden water system.
Standard Keurig Descaling Steps
- Unplug and cool. Turn the brewer off and allow it to cool. Remove any pod, empty the reservoir, and take out the water filter cartridge if your machine uses one.
- Add descaling solution and water. Pour the bottle of Keurig descaling solution into the reservoir, then fill the empty bottle with fresh water and add that as well, or follow the dilution ratio on your chosen descaler.
- Place a large mug on the drip tray. Use a mug that holds at least 12 oz, because the brewer will dispense multiple cups of hot liquid during the process.
- Run brew cycles with no pod. Start a brew cycle without inserting a pod. Discard the hot liquid after each cycle and repeat until the reservoir is empty or the brewer asks you to add water.
- Let the machine sit. When the solution has cycled through, let the brewer sit for about 30 minutes with the power on but no brewing. This contact time helps the descaler continue dissolving mineral deposits inside the heating system and water lines.
- Rinse with fresh water. Rinse the reservoir thoroughly, fill it with clean water, and run repeated brew cycles (again, with no pod) until you have run at least one full reservoir of water through the machine and no smell or taste of solution remains.
- Reinstall the water filter. If you use a reservoir filter, install a fresh cartridge after descaling so it is not sitting in concentrated solution residue.
If Your Keurig Has a Descale Mode
Newer Keurig models include a dedicated Descale mode and button sequence. The general process is similar, but you may need to press and hold specific cup-size buttons to start or finish the cycle, and some brewers will not clear the descale light until their built-in program is complete.
Because the exact button combination varies by model, check your manual or Keurig’s online instructions for your specific machine. As a rule of thumb, you will still add descaling solution and water to the tank, enter Descale mode, run repeated brew cycles into a large mug until prompted to add water, then refill with clean water and run additional rinse cycles until the descale light shuts off and the coffee tastes normal again.
Descaling Summary
- Empty the reservoir, remove any filter cartridge, and let the machine cool before you start.
- Add descaling solution and water as directed and run brew cycles with no pod.
- Let the brewer sit for around 30 minutes, then flush at least one full tank of fresh water through it.
- Only return to normal brewing once there is no smell or taste of descaler in the cup.
Vinegar vs Descaling Solution
Many Keurig owners want to know whether vinegar works just as well as a commercial descaler. Vinegar can work — it is acidic and can break down mineral deposits — but it is not always the best choice.
White vinegar may be enough to restore normal performance in lightly scaled machines, and it is inexpensive and easy to find. However, it tends to leave a stronger smell and taste if you do not rinse extremely well. Dedicated descaling solutions are generally formulated to work more efficiently on coffee-machine scale while being easier to flush out afterward.
For most users, vinegar is acceptable in a pinch, but a proper descaling solution is usually the better long-term option for both performance and user experience.
Why the Descale Light Stays On
One of the most frustrating Keurig issues is completing a descaling cycle only to see the descale light remain on. In many cases, this does not mean the process failed. It simply means the machine still detects that the system has not been fully flushed or reset.
- Run more rinse cycles. The most common fix is simply to run additional water-only brew cycles until the machine has flushed enough clean water through the system.
- Check for Descale mode completion. On models with a programmed Descale cycle, the light may not turn off until the built-in sequence is fully complete.
- Perform a reset if required. Some machines require a specific button combination or power cycle after descaling — refer to your user manual or support page for model-specific steps.
Why Your Keurig Is Brewing Slowly
Slow brewing is one of the clearest signs that a Keurig needs attention. In most cases, the cause is either mineral scale in the internal water path or coffee residue clogging the needle system. Sometimes it is both.
As mineral deposits build up, the pump has to work harder to move water through narrower spaces, leading to longer brew times, sputtering, and reduced cup volume. If the machine also has trapped grounds around the needle or pod holder, the flow becomes even less consistent.
The best fix is a full maintenance approach: clean the removable parts, clear the needles, then descale the internal system. For many users, that combination restores a “slow” machine to normal operation without needing repair or replacement.
How Water Quality Affects Descaling Frequency
Not every Keurig owner needs to descale on the same schedule because water quality varies dramatically from one home to another. If your tap water is hard, meaning it contains higher levels of dissolved minerals like calcium and magnesium, scale forms faster and your brewer will usually need more frequent descaling to stay fast and hot.
Using filtered water or a simple pitcher filter can slow this process, reduce the amount of limescale that forms, and improve flavor at the same time. It will not eliminate the need to descale forever, but it can stretch your descaling interval closer to the three-to-six-month range instead of every couple of months in very hard-water areas.
If your Keurig has a built-in reservoir water filter, plan to replace the cartridge roughly every two months or after about 60 tank refills. Pairing regular filter changes with a consistent descaling schedule is one of the easiest ways to keep your coffee tasting clean and to protect the internal heating system over the long term.
FAQs: Descale Keurig
How often should you descale a Keurig?
Can you use vinegar to descale a Keurig?
Why is my Keurig brewing slowly?
Why is my Keurig still showing the descale light?
How often should I change my Keurig water filter?
What happens if you never descale a Keurig?
Is it safe to leave water in my Keurig overnight?
Does using filtered water mean I never have to descale?
Can I use any descaling solution in my Keurig?
Do I need to clean the needles if I already descale?
Should I run a plain water cycle after flavored or sweet K-Cups?
CoffeeGearHub product shortlist
Continue with Keurig maintenance gear on CoffeeGearHub
Browse relevant CoffeeGearHub product categories and compare current verified merchant offers before leaving the site.
Continue Learning
Keep improving your Keurig setup
Keurig buying and comparisons
Brewing and reusable-pod guides