
How to Make Pour Over Coffee
Editorial standards: brewing guidance, equipment roles, workflow, recipe variables, and product limitations are separated where relevant.
At a glance
What this guide covers
A practical pour-over brewing guide covering ratio, grind size, water temperature, bloom, pouring pattern, drawdown, brewer differences, troubleshooting, and the equipment that makes the process easier to repeat.
Editorial analysis
Build a repeatable baseline first
Pour-over rewards consistency more than complexity. Start with a stable coffee-to-water ratio, medium-fine grind, controlled water temperature, and a repeatable pour sequence. Once the brew is predictable, change one variable at a time and use taste plus total drawdown time to decide what to adjust next.
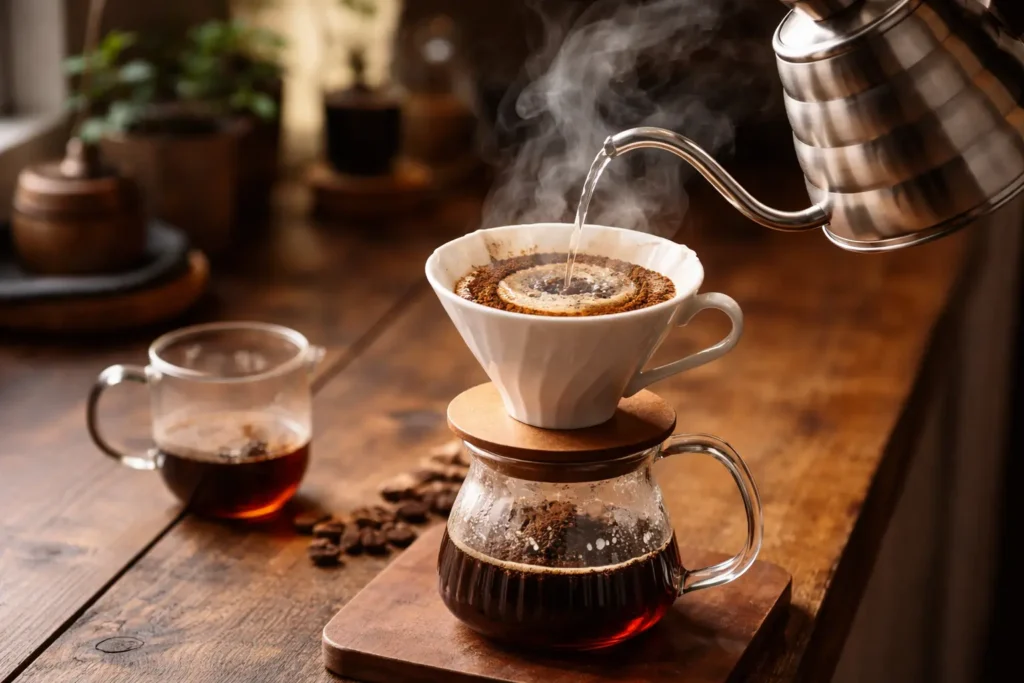
Pour over coffee is the most controllable, most transparent, and — when done correctly — the most rewarding way to brew coffee at home. Hot water poured slowly and deliberately over freshly ground coffee in a paper filter, controlled entirely by your hands, your kettle, and your technique. The result is a cup of exceptional clarity, brightness, and complexity that reveals the character of the bean in a way no other common brewing method can match.
This guide covers everything: the exact grind, ratio, and temperature parameters for every roast level; a step-by-step recipe that works for any dripper; specific recipes for the three most-used pour over brewers; practical equipment guidance; and the full troubleshooting matrix for every problem home pour over brewers encounter.
What Pour Over Coffee Is — and Why It Tastes Different
Pour over is manual percolation brewing: hot water is poured slowly over coffee grounds held in a paper or metal filter inside a cone or flat-bottom dripper, and gravity draws the water through the grounds and filter into a cup or server below. What makes it fundamentally different from an automatic drip machine is that you control every extraction variable by hand — water temperature, flow rate, saturation pattern, bloom duration, and total contact time. An automatic drip machine makes these decisions for you, usually poorly. In pour over, precision is possible in a way that no programmed machine can replicate without significant expense.
🔬 The science of filter brewing: Paper filters used in pour over remove diterpenes — cholesterol-raising compounds including cafestol and kahweol — that pass freely through metal filters and French press mesh. Research has confirmed that paper-filtered brews contain significantly lower concentrations of these compounds than unfiltered methods. Pour over produces not only a cleaner-tasting cup but also a chemically distinct one from unfiltered brewing.
| Brew method | Extraction type | Filter type | Cup character | Control level |
|---|---|---|---|---|
| Pour over ✓ | Percolation | Paper (or metal) | Clean, bright, origin-forward, complex aromatics | Maximum — every variable is manual |
| Automatic drip | Percolation | Paper | Similar to pour over but less precise; often lower temperature | Minimal — machine controls all variables |
| French press | Immersion | Metal mesh | Heavy body, rich oils, more sediment, less clarity | Moderate — ratio and steep time are manual |
| AeroPress | Immersion + pressure | Paper or metal | Concentrated, versatile; can mimic pour over or espresso | High — all variables are manual |
| Cold brew | Immersion | Paper or metal | Low acidity, smooth, chocolate-forward, concentrated | Moderate — ratio and steep time are manual |
| Espresso | Pressure extraction | Metal basket | Concentrated, intense, full body, crema | Maximum — requires precise grind, dose, yield, and temperature |
Why Grind Is the Primary Lever in Pour Over
Grind size controls how fast or slow water flows through the coffee bed under gravity. Finer grounds pack more tightly, slow the flow rate, and increase contact time between water and coffee — which increases extraction yield and, beyond a certain point, extracts bitter compounds. Coarser grounds let water flow through quickly, reducing contact time and extraction yield, producing a weak, sour, underdeveloped cup. Every other pour over variable operates within the extraction position that grind has already established. Get grind right first; everything else is a refinement.
⚠️ The most common pour over mistake: Adjusting grind and temperature simultaneously when a brew tastes wrong. Change grind size only. Then taste. Then — only if grind is producing the correct brew time — adjust temperature or ratio as secondary refinements. One variable per brew.
⚙️ Grind is only controllable with a burr grinder. A blade grinder produces random particle sizes that make brew-time adjustment meaningless — you cannot reliably go “one step finer.” The Baratza Encore ESP is the CoffeeGearHub recommended entry grinder for pour over: 40 stepped settings, consistent particle output, and linear brew-time response to each click.
Baseline Parameters: Lock These Before Brewing
Pour over produces consistent, readable results only when all variables are fixed except the one being adjusted. Set these parameters before pulling any diagnostic brews and do not change them until brew time is in the correct window.
| Parameter | Starting value | Why this number | When to adjust |
|---|---|---|---|
| Dose | 20g | Standard single-serving reference quantity — produces a readable brew time and enough volume to assess flavour clearly | Only after grind and temperature are dialled — dose adjustments change strength but not extraction quality |
| Yield target | 320g (1:16 ratio) | SCA-aligned starting reference for filter brewing; balanced extraction for most medium roast beans | Extend to 340g (1:17) if bitter note persists after timing is in window; reduce to 300g (1:15) if the cup needs more body and intensity |
| Water temperature | 200°F / 93°C for medium roast | Mid-range of the SCA-recommended 195–205°F window; correct for most medium roast beans | After brew time is in the 2:30–3:30 window — raise 1–2°C for sourness in window; lower 1–2°C for bitterness in window |
| Brew time target | 2:30–3:30 minutes total | The extraction window for a balanced filter brew at standard ratio and temperature — a diagnostic reference, not a pour-stop trigger | Not adjusted directly — follows from grind adjustment |
| Bloom | 40–60g water (2–3× coffee weight), 30–45 second rest | Saturates all grounds and allows CO2 to escape before main pours begin — essential for even extraction | Extend to 45–60 seconds for very fresh beans (under 10 days post-roast) |
🌡️ Temperature guesswork is the enemy of consistent pour over. The Fellow Stagg EKG sets water temperature to the exact degree, holds it for 60 minutes while you grind and prep, and its counterbalanced gooseneck spout makes the slow spiral pour feel effortless. It eliminates two variables — temperature and pour control — in a single purchase.
Brew Time as Grind Diagnosis: Reading What the Clock Tells You
Total brew time — from first bloom pour to the last drop leaving the filter — is the fastest, most reliable signal that your grind is in or out of range before you even taste the cup.
| Total brew time (20g / 320g) | What it means | Grind adjustment | Do not adjust |
|---|---|---|---|
| Under 1:30 | Grind drastically too coarse — almost no bed resistance | Grind 4–6 steps finer; confirm dose is 20g | Do not pull repeated brews at this setting — adjust first |
| 1:30–2:00 | Grind too coarse — water flowing through too quickly | Grind 2–3 steps finer | Do not adjust temperature or yield yet |
| 2:00–2:30 | Approaching window — slightly too coarse | Grind 1–2 steps finer | Do not adjust temperature or yield yet |
| 2:30–3:30 ✓ | Target window — bed resistance is correct for this grind and dose | No adjustment — taste the brew now | Taste first before touching anything |
| 3:30–4:30 | Slightly too fine or slight uneven distribution | Grind 1–2 steps coarser; or check grounds distribution for clumps | Do not adjust temperature yet |
| Over 4:30 | Grind too fine — excessive bed resistance | Grind 2–3 steps coarser; confirm grounds are evenly distributed in filter | Do not continue adding water — wait for drawdown before next brew |
| Brew stalls completely | Grind far too fine — complete blockage | Grind 5+ steps coarser; confirm filter is seated correctly | Do not disturb the brew in progress — let it drain, then adjust |
🔬 Use a scale for every brew. Measuring water by volume introduces error — kettle markings are approximate, and water density changes with temperature. A digital kitchen scale in grams gives you a precise, reproducible yield weight every time. Without knowing your exact yield, grind adjustments are difficult to read. Weigh in and weigh out.
⚖️ A scale with a built-in timer changes everything. The Hario V60 Drip Scale auto-tracks both your yield in grams and your total brew time from the same compact device — placed under your dripper, it tells you exactly when you’ve hit 320g yield and exactly when the drawdown finished. No mental math, no separate phone timer.
Useful brewing essentials
Four tools that make pour-over easier to repeat
These are the practical pieces of gear most closely tied to the brewing method in this guide: the dripper, controlled kettle, burr grinder, and a scale with a timer.
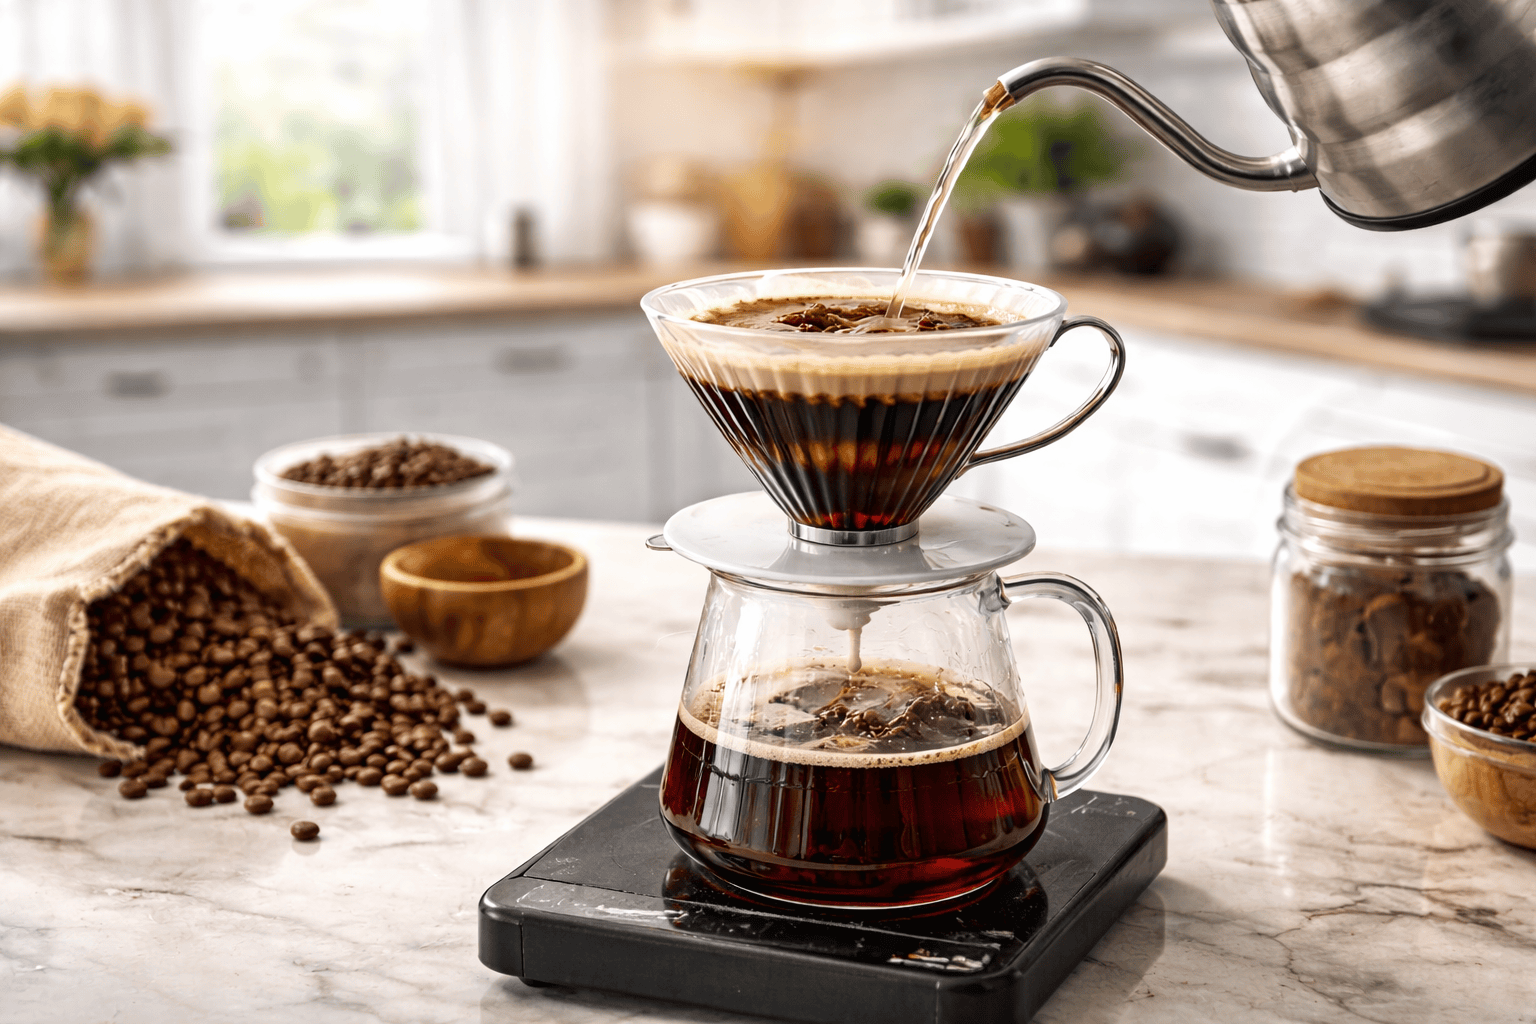 Hario V60 02Cone dripper for controlled single-cup pour-over brewing.View on Amazon →
 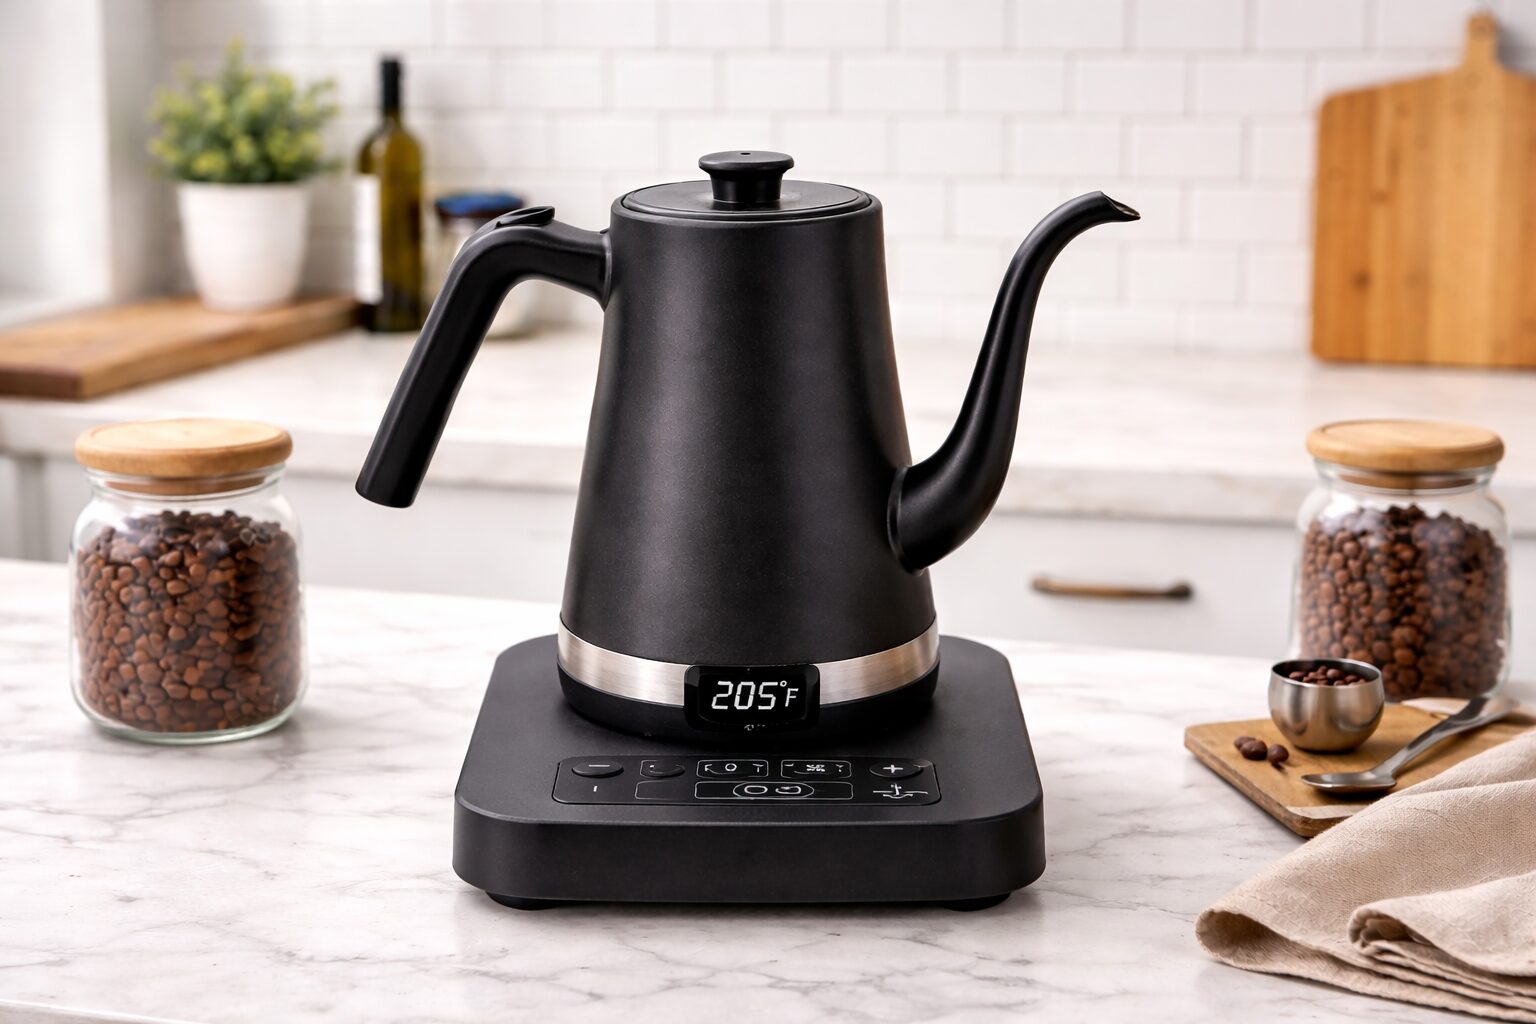 Fellow Stagg EKGTemperature-controlled gooseneck kettle for precise pouring.View on Amazon →
 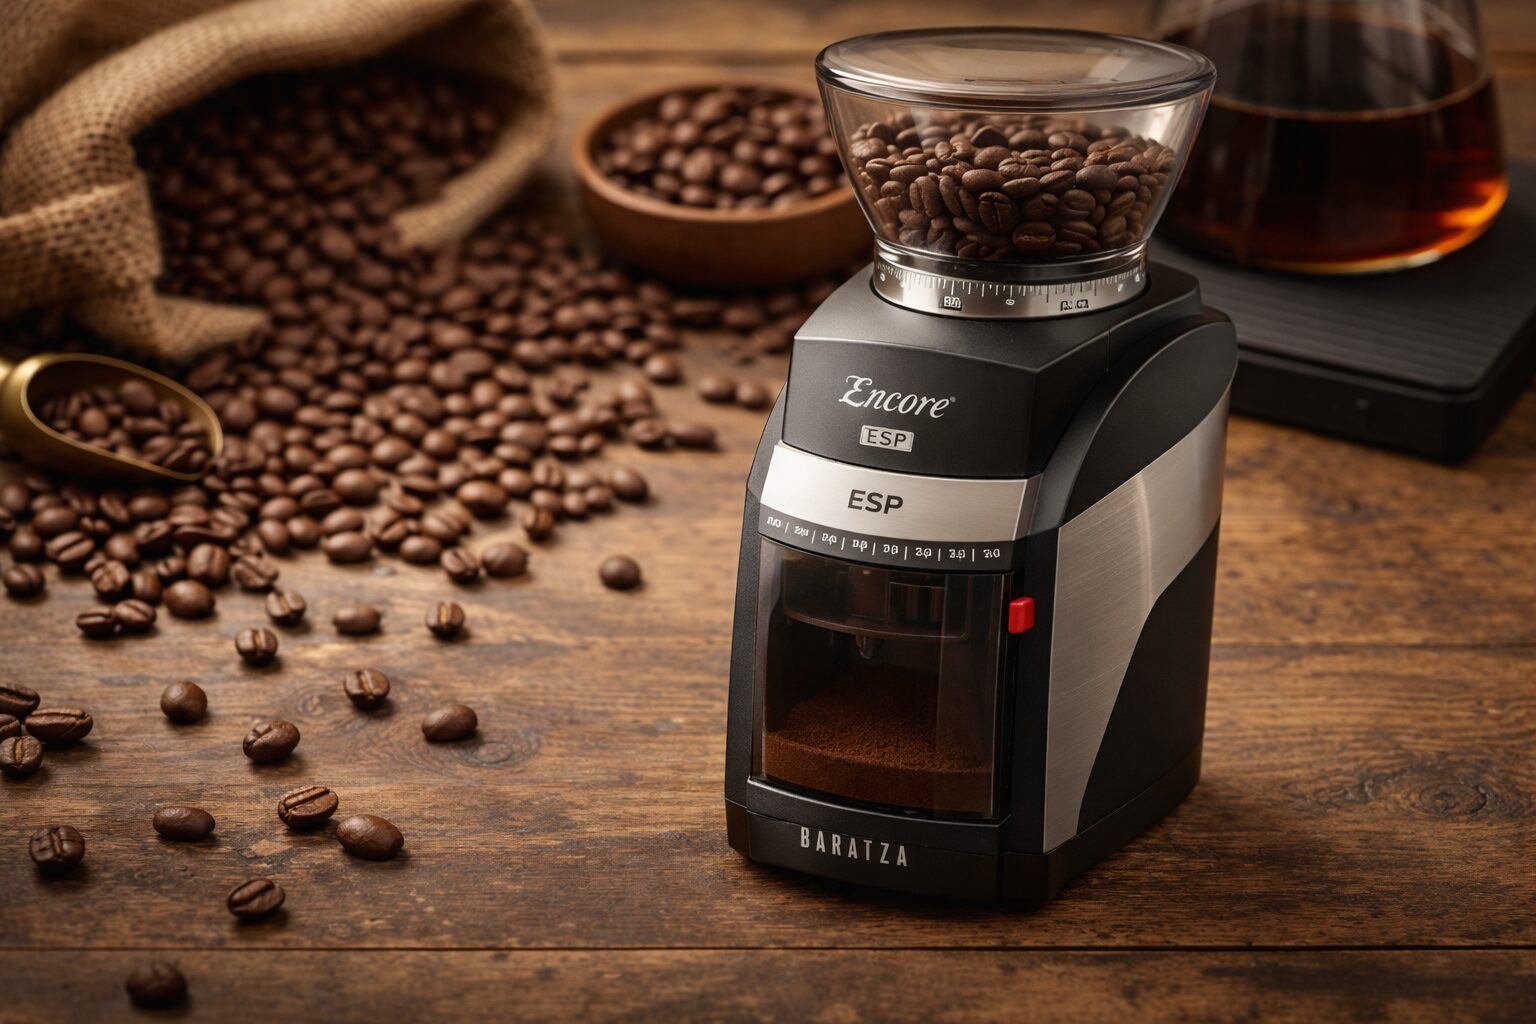 Baratza Encore ESPBurr grinder with useful range for filter coffee and broader home brewing.View on Amazon →
 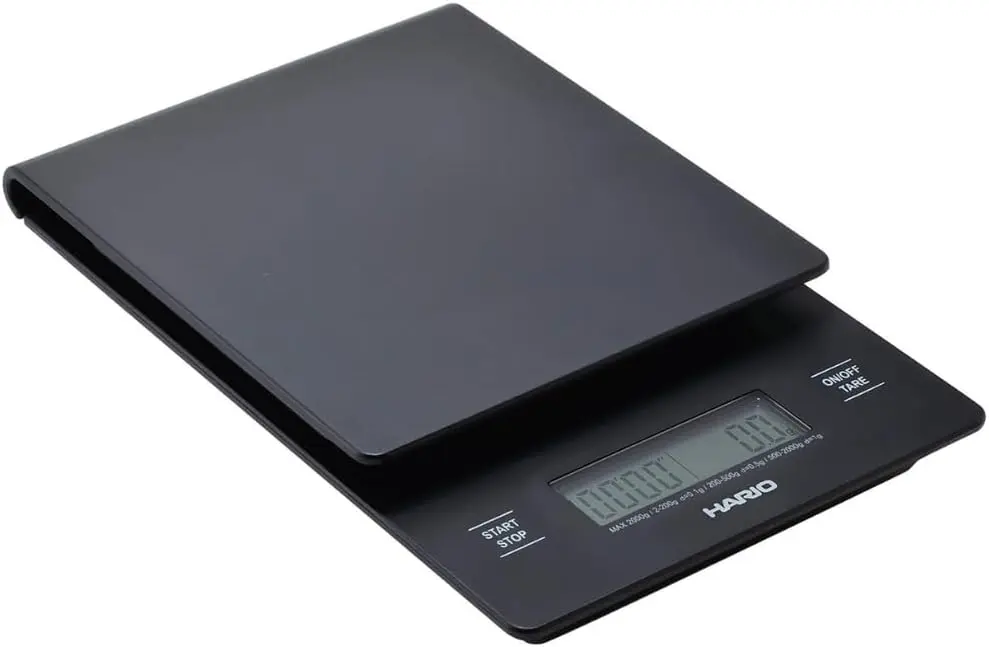 Hario V60 Drip ScaleTracks brew weight and time together for repeatable recipes.View on Amazon →
Affiliate disclosure: These links may earn CoffeeGearHub a commission at no additional cost to you. As an Amazon Associate, we earn from qualifying purchases. Prices and availability can change.
Step-by-Step Pour Over Brew Recipe
This is the core recipe — a 20g single-serving pour over at a 1:16 ratio (20g coffee / 320g water). It works for any cone-style dripper including the V60 and most flat-bottom drippers including the Kalita Wave.
What You Need for This Recipe
- Pour over dripper (V60, Kalita Wave, or similar) + matching paper filters
- Gooseneck kettle — electric with temperature control strongly preferred
- Digital scale measuring in grams with built-in timer
- Burr grinder — ideally set to medium-fine
- 20g of fresh whole bean coffee, medium or light roast
- 360g filtered water (320g brew water + approximately 40g for filter rinse)
Setup (before you start the timer)
- Heat water to 200°F / 93°C — variable-temperature kettle is the most reliable method; alternatively, bring to a boil and rest 45 seconds off heat
- Grind 20g to medium-fine — table salt texture; grind immediately before brewing
- Place filter in dripper, set on server or mug on scale; rinse filter with approximately 40g of hot water — discards paper taste and preheats brewer; discard rinse water; reset scale to zero
- Add grounds to rinsed filter; gently tap or shake to settle into a flat, level bed
The Brew (start timer at first pour)
- 0:00 — Bloom: pour 40–60g in a slow centre-outward spiral; saturate all grounds; wait until 0:30–0:45 while CO2 releases and bubbling slows
- 0:45 — Pour 2: pour slowly to approximately 180g total in a spiral from centre outward; stop 1cm from filter walls; pause 10–15 seconds
- 1:30 — Pour 3: continue pouring to 320g total in the same slow spiral pattern; maintain a thin, pencil-width stream throughout
- Wait for drawdown: allow all water to drain completely; target total finish time is 2:30–3:30
- Remove dripper; swirl server gently; serve immediately
✅ The brew log habit: Keep a notebook or phone note beside your kettle. After every dialled-in session write: bean name, roast date, grinder setting, dose, yield, temperature, total brew time, and taste notes. When you open a new bag of the same bean, start at the same setting. Over time, this log becomes a reference library that makes every new brew faster and more confident.
The Bloom: Science and Technique
The bloom is the single technique that separates consistent pour over from inconsistent pour over. When coffee beans are roasted, the process generates carbon dioxide (CO2) that becomes trapped within the bean’s cellular structure. When you add hot water to fresh grounds, the remaining CO2 erupts outward. Without a bloom phase, that gas actively interferes with water absorption during the main pour, creating uneven channels through the coffee bed and producing a flat, underdeveloped extraction.
| Bloom variable | Recommended value | What happens if wrong |
|---|---|---|
| Bloom water amount | 2–3× the coffee weight (40–60g for 20g coffee) | Too little: dry spots remain; uneven saturation — too much: starts the main extraction prematurely |
| Bloom duration | 30–45 seconds | Too short: CO2 still present and active — too long: grounds begin to cool and dry at the edges |
| Pour pattern during bloom | Slow spiral from centre outward; cover all grounds | Dry spots in corners or edges = those grounds extract at a different rate = uneven cup |
| Visual cue: what to look for | Grounds bubble, swell, rise visibly, then subside and settle | No bubbles = beans are stale; wait for bubbling to slow before proceeding with main pours |
🔬 How to read your bloom: A vigorous, domed bloom — grounds rising and actively bubbling for the full 30–45 seconds — indicates coffee roasted within the last two to three weeks. A modest bloom with light bubbling indicates beans two to four weeks post-roast — still good. Very little bubbling or no visible movement indicates beans older than five to six weeks; aromatic compounds are already degraded. No bloom adjustment changes this — buy fresher beans.
Roast-Level Grind and Temperature Reference
Roast level changes the physical and chemical structure of the bean — density, porosity, and solubility — in ways that directly affect how a given grind size and temperature performs in pour over. A medium roast locked recipe does not transfer directly to a light roast or dark roast.
| Roast level | Bean characteristics | Grind vs medium | Water temperature | Ratio adjustment | Common problem |
|---|---|---|---|---|---|
| Light roast ☀️ | Dense, hard, less soluble — extracts slowly in hot water | 1–3 steps finer than medium roast reference | 203–205°F / 95–96°C | 1:16 to 1:17 | Persistently sour despite finer grind and higher temperature — check kettle is actually reaching 203°F |
| Medium roast 🌤 ✓ | Balanced density and solubility — the calibration reference | Baseline | 198–202°F / 92–94°C | 1:15 to 1:16 standard | Most forgiving roast level |
| Medium-dark roast | More porous than medium — extracts faster | 1–2 steps coarser than medium roast reference | 196–200°F / 91–93°C | 1:15 | Bitterness arriving early — coarsen grind before adjusting temperature |
| Dark roast 🌑 | Highly porous, brittle, very soluble | 2–4 steps coarser than medium roast reference | 195–198°F / 90–92°C | 1:14 to 1:15 | Harsh, ashy bitterness — pour over is not the ideal method for very dark roast beans |
| Very fresh beans (under 7 days post-roast) | High CO2 — inconsistent bed resistance | Often 1 step coarser than same bean at 10–14 days | Standard for roast level | Standard for roast level | Inconsistent brew times — rest beans 5–10 days before serious dial-in |
| Old beans (40+ days post-roast) | Stale — CO2 depleted, aromatic compounds oxidised | Often 1 step finer than peak freshness | Standard for roast level | Standard for roast level | Flat, hollow cup — no parameter adjustment recovers flavour from stale coffee; buy fresh beans |
Dripper-Specific Recipes: V60, Chemex, and Kalita Wave
The three most widely used pour over drippers each have distinct flow dynamics that require different grind settings, pour patterns, and total brew times.
| Feature | Hario V60 | Chemex | Kalita Wave | Fellow Stagg X | Melitta |
|---|---|---|---|---|---|
| Dripper shape | Cone, single large exit hole | Hourglass (dripper + carafe) | Flat bottom, three small holes | Flat bottom, single hole | Cone, single exit hole |
| Filter type | V60 paper (01 or 02) | Chemex bonded paper (thicker) | Kalita Wave paper (flat-bottom) | Fellow paper (flat-bottom) | Melitta #2 or #4 paper |
| Skill level | Intermediate–Advanced | Beginner–Intermediate | Beginner–Intermediate | Intermediate | Beginner |
| Grind vs baseline | Medium-fine — table salt | Medium — slightly coarser than V60 | Medium-fine to medium | Medium-fine | Medium-fine |
| Brew time target | 2:30–3:30 | 4:00–5:30 | 3:00–4:00 | 2:30–3:30 | 2:30–3:30 |
| Best for | Experts, light roasts, maximum control | Groups, clarity, visual presentation | Daily brewers, beginners, consistency | Precision enthusiasts, flat-bed fans | Absolute beginners, budget entry |
Hario V60 Recipe (02 size, 1 cup)
- Coffee: 20g, medium-fine grind (table salt)
- Water: 320g at 200–205°F
- 0:00 — Bloom: 40g in slow centre spiral; wait to 0:45
- 0:45 — Pour 2: pour to 180g total; slow spiral; pause
- 1:30 — Pour 3: pour to 320g total; slow spiral to finish
- Target finish: 2:45–3:15 total drawdown
- Technique note: after the last pour, gently swirl the V60 in a slow horizontal circle to level the coffee bed for a cleaner final draw-down
Chemex Recipe (6-cup, 3–4 servings)
- Coffee: 50g, medium grind (slightly coarser than V60)
- Water: 800g at 200°F
- 0:00 — Bloom: 100g in slow spiral; wait 45 seconds
- 0:45 — Pour 2: pour to 330g total
- 2:00 — Pour 3: pour to 565g total
- 3:00 — Pour 4: pour to 800g total
- Target finish: 4:30–5:30 total drawdown
- Technique note: if drawdown stalls, switch to a continuous pour to keep water moving through the denser Chemex filter
Kalita Wave Recipe (185, 1–2 cups)
- Coffee: 22g, medium-fine grind
- Water: 360g at 200°F
- 0:00 — Bloom: 44g in slow spiral; wait 45 seconds
- 0:45 — Pour 2: pour to 200g total
- 1:45 — Pour 3: pour to 360g total
- Target finish: 3:00–4:00 total drawdown
- Technique note: the Kalita’s flat-bottom bed is the most forgiving of imprecise pour patterns — centre pours work well and the three exit holes regulate flow more than a single cone exit
Coffee-to-Water Ratio Quick Reference
| Target yield | Coffee (grams) | Water (grams) | Ratio | Notes |
|---|---|---|---|---|
| 8 oz / 1 small cup | 15g | 240g | 1:16 | Small mug; quick brew; good starting point for very first attempt |
| 12 oz / 1 standard cup | 20g | 320g | 1:16 | Standard single-serving recipe — all parameters in this guide use this as baseline |
| 16 oz / large cup or travel mug | 28g | 450g | 1:16 | Scale up pours proportionally; bloom with 56–84g |
| 24 oz / Chemex 3-cup | 36g | 600g | 1:16.7 | Recommended Chemex starting dose for 3-cup model |
| 40 oz / Chemex 6-cup | 50g | 800g | 1:16 | Recommended Chemex dose for 6-cup model; scale pours to 4 pulses |
Troubleshooting Matrix: Every Pour Over Problem Diagnosed
Identify your symptom in the first column. Apply fixes in the order listed — the first fix resolves the problem in the majority of cases. Change one variable per brew throughout.
| Symptom | Likely cause | Fix — in order |
|---|---|---|
| Sour, sharp, tart taste — under 2:30 brew time | Grind too coarse — water flowing through too quickly; under-extraction | Grind 2–3 steps finer → confirm water is at 200°F → confirm dose is 20g → if still sour in window, raise temperature 1–2°C |
| Bitter, harsh, dry aftertaste — over 3:30 brew time | Grind too fine — too much contact time; over-extraction | Grind 2–3 steps coarser → confirm water is not above 205°F → if still bitter in window, lower temperature 1–2°C or reduce yield to 300g |
| Brew stalls completely — water won’t drain | Grind far too fine; or filter has collapsed and sealed against dripper wall | Grind 5+ steps coarser → confirm filter is seated correctly with the paper standing away from the dripper wall → rinse filter before adding grounds to help it seat correctly |
| Flat, weak, no flavour despite correct timing | Beans too stale; or ratio too dilute | Check roast date — if 40+ days, buy fresh beans → if beans are fresh, increase dose to 22g or reduce water to 300g → confirm grind is fine enough for the correct brew time |
| Papery or cardboard background flavour | Filter not rinsed before brewing | Always rinse filter with hot water before adding grounds; discard rinse water |
| Brew time correct but still sour and flat | Water temperature too low for roast level; or beans too fresh | Raise temperature 1–2°C → confirm beans are at least 5–7 days post-roast → extend bloom wait to 45–60 seconds if beans are very fresh |
| Brew time correct but still bitter | Water temperature too high for roast level; or dark roast at medium roast parameters | Lower temperature 1–2°C → for dark roast reduce to 195–198°F → reduce yield from 320g to 300g |
| Brew time inconsistent from brew to brew at same settings | Dose weight varying between brews; or grind distribution uneven in filter | Weigh every dose on a scale → confirm grounds are evenly distributed in filter — gently tap to level before pouring → confirm grinder setting has not shifted |
| Coffee cools too fast before drinking | Cold server or mug; cold dripper | Preheat server and mug with hot water before brewing; discard before use |
| No bloom — no bubbling when water is added | Beans too stale — CO2 fully depleted | Buy fresh beans roasted within the last 3–5 weeks; no technique adjustment restores bloom or the flavour it indicates |
| Water channelling down filter walls | Pouring too close to filter walls; or uneven grounds bed | Always stop spiral pour at least 1cm from the filter walls → level the coffee bed before starting → gently swirl the dripper after the last pour |
Final Takeaway: The Pour Over System
Pour over brewing is not complicated when you understand what each variable controls. Grind size sets the flow rate and extraction window — adjust it until brew time is in the 2:30–3:30 range. Temperature and ratio are refinements within that window. The bloom is a functional step that the entire subsequent extraction depends on. A scale makes every adjustment readable. A gooseneck kettle makes every pour controllable. Fresh beans make every technique element worth applying. The brew log you keep across months of pour over brewing becomes your most useful tool — a reference library of every bean you have used, every setting that worked, and every adjustment that found the sweet spot.
FAQs: How to Make Pour Over Coffee
What is the best coffee-to-water ratio for pour over?
The SCA-recommended starting ratio is 1:16 — 1 gram of coffee per 16 grams of water. For a standard single serving, use 20g coffee to 320g water. Adjust to 1:15 for a stronger cup or 1:17 for a lighter brew. Always measure by weight, not volume scoops, for reproducible results.
What grind size should I use for pour over coffee?
Medium-fine is the standard starting point — a texture similar to table salt or coarse sand. V60 works well at medium-fine to medium. Chemex requires a slightly coarser medium grind because its filters are significantly thicker. Use total brew time as the calibration tool: under 2:30 means go finer; over 3:30 means go coarser.
What water temperature should I use for pour over coffee?
195–205°F (90–96°C) is the standard range with 200°F (93°C) as the all-purpose baseline. Use higher temperatures (203–205°F) for light roasts. Use lower temperatures (195–198°F) for dark roasts. Without a thermometer, bring water to a boil and rest 45–60 seconds off heat.
Do I need a gooseneck kettle for pour over?
Yes — for consistent results, a gooseneck kettle is essential. The narrow, curved spout is the only practical way to produce the slow, controlled, spiral stream of water that even saturation requires. A regular kettle pours too fast and too imprecisely for a clean bloom and controlled pulse pours.
How long should pour over coffee take to brew?
Total brew time from first bloom pour to final drawdown should be 2:30–3:30 minutes for a standard single-cup V60 or Kalita Wave recipe. Chemex takes 4:00–5:30 due to its thicker filters. If consistently outside the window, adjust grind size: finer to slow the draw-down, coarser to speed it up.
V60 vs Chemex vs Kalita Wave — which should I buy first?
For most beginners: the Kalita Wave. Its flat-bottom design and three small exit holes create a more forgiving, even flow rate. The V60 produces exceptional coffee but requires more practice. The Chemex is ideal for multiple cups and maximum cup clarity.
What is the bloom in pour over and why does it matter?
The bloom is the initial phase where approximately 2–3 times the coffee weight in water is poured over the grounds and allowed to rest for 30–45 seconds. Freshly roasted coffee contains CO2 trapped inside the bean from roasting. Without a bloom, that gas creates uneven channels through the coffee bed during extraction, leading to inconsistent, underdeveloped flavour.
Can I use pre-ground coffee for pour over?
Yes, but results will be less vibrant than freshly ground. Look specifically for coffee labelled pour over, filter coffee, or medium grind — avoid all-purpose grinds which tend to be too coarse for pour over. For anyone brewing pour over regularly, a burr grinder is the single most impactful equipment upgrade available.
Related guide: Filter material changes body, clarity, oils, and cleanup. See our paper vs metal vs cloth pour-over filter comparison before choosing a filter.
CoffeeGearHub shortlist
Compare CoffeeGearHub product pages
Review specifications and current verified merchant offers on CoffeeGearHub before leaving the site.
Continue Learning
Use these guides to refine technique, compare brewer styles, and match the rest of your setup to the way you prefer to brew.
Grind & extraction
In this guide
- What Pour Over Coffee Is — and Why It Tastes Different
- Why Grind Is the Primary Lever in Pour Over
- Baseline Parameters: Lock These Before Brewing
- Brew Time as Grind Diagnosis: Reading What the Clock Tells You
- Step-by-Step Pour Over Brew Recipe
- The Bloom: Science and Technique
- Roast-Level Grind and Temperature Reference
- Dripper-Specific Recipes: V60, Chemex, and Kalita Wave
- Coffee-to-Water Ratio Quick Reference
- Troubleshooting Matrix: Every Pour Over Problem Diagnosed
- Final Takeaway: The Pour Over System
- FAQs: How to Make Pour Over Coffee